house projects
- Coffee Cups (or drinkware) - I love coffee but really who needs to have around 30 coffee cups. I am not sure who we were planning on inviting over for coffee or hot chocolate but we realized that was way too many.
- Tupperware - How can we have so much of this and nothing matches. Where did all the lids to the small-sized containers go and why am I stuck with so many large lids with no containers. Let's just say we didn’t keep a lot and have paired this down so we can always find a lid and dish.
- Cooking Utensils - Don’t get me wrong it is always great to have a spare but I am not sure we needed 10 spatulas. It was more than likely we only needed 2-3 as we used the same one most of the time.
- Mismatched stuff - During our cleaning out we found lots of plates, cups, and other items that were not a full set even though we had one full nice set already. These were perfect candidates to not work back into the cycle as one cup isn’t as good as a nice set of 12.

- Buy a custom door that would cost over $300 and probably take a couple of weeks until I would get it back or
- Buy a standard door and cut it down to size
- Over-buy at your home improvement store. You will be more frustrated driving back and forth than having to go there once in when you are done to return everything.
- Check the tile pieces that you buy before you install them. Otherwise, you will end up installing one that wasn't the same color (Yes this happened to me see below).
- Buy the right trowel for the size of tile you are using and then make sure you don't use too much mortar. Especially, be careful on the small tiles as I spent a lot of time in the back end trying to scrape it out of the joints so my grout would fill it later.
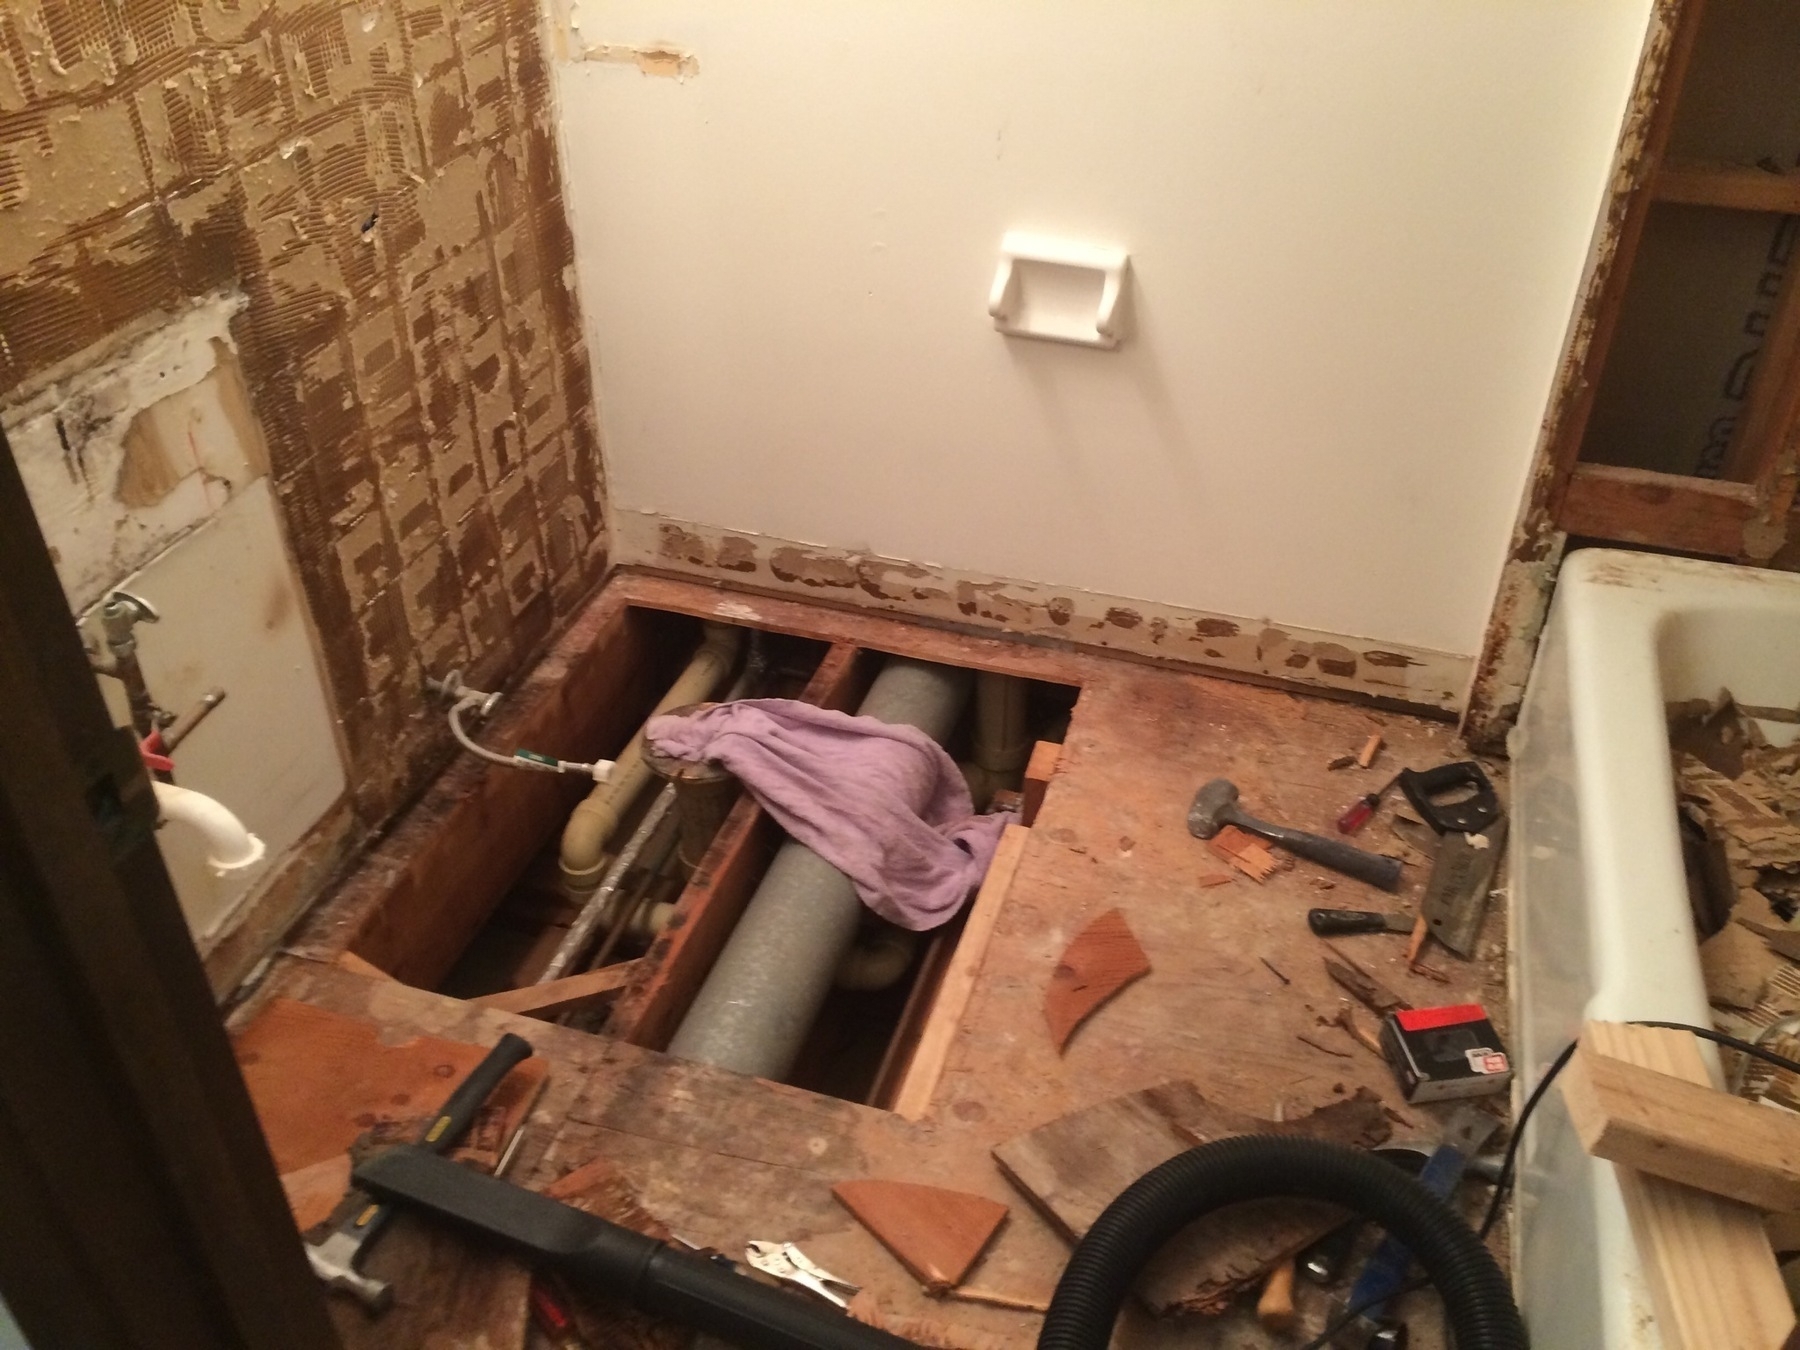
- You will run into more problems than you anticipated and are going to start replacing a lot more things (e.g., Pipes, Sub-floor, Walls).
- Did I mention that you should overbuy things at your Home Improvement Store
- Realize that as you are going to get sidetracked by your significant other to complete "Fluff" projects some of which are unrelated to the task at hand.
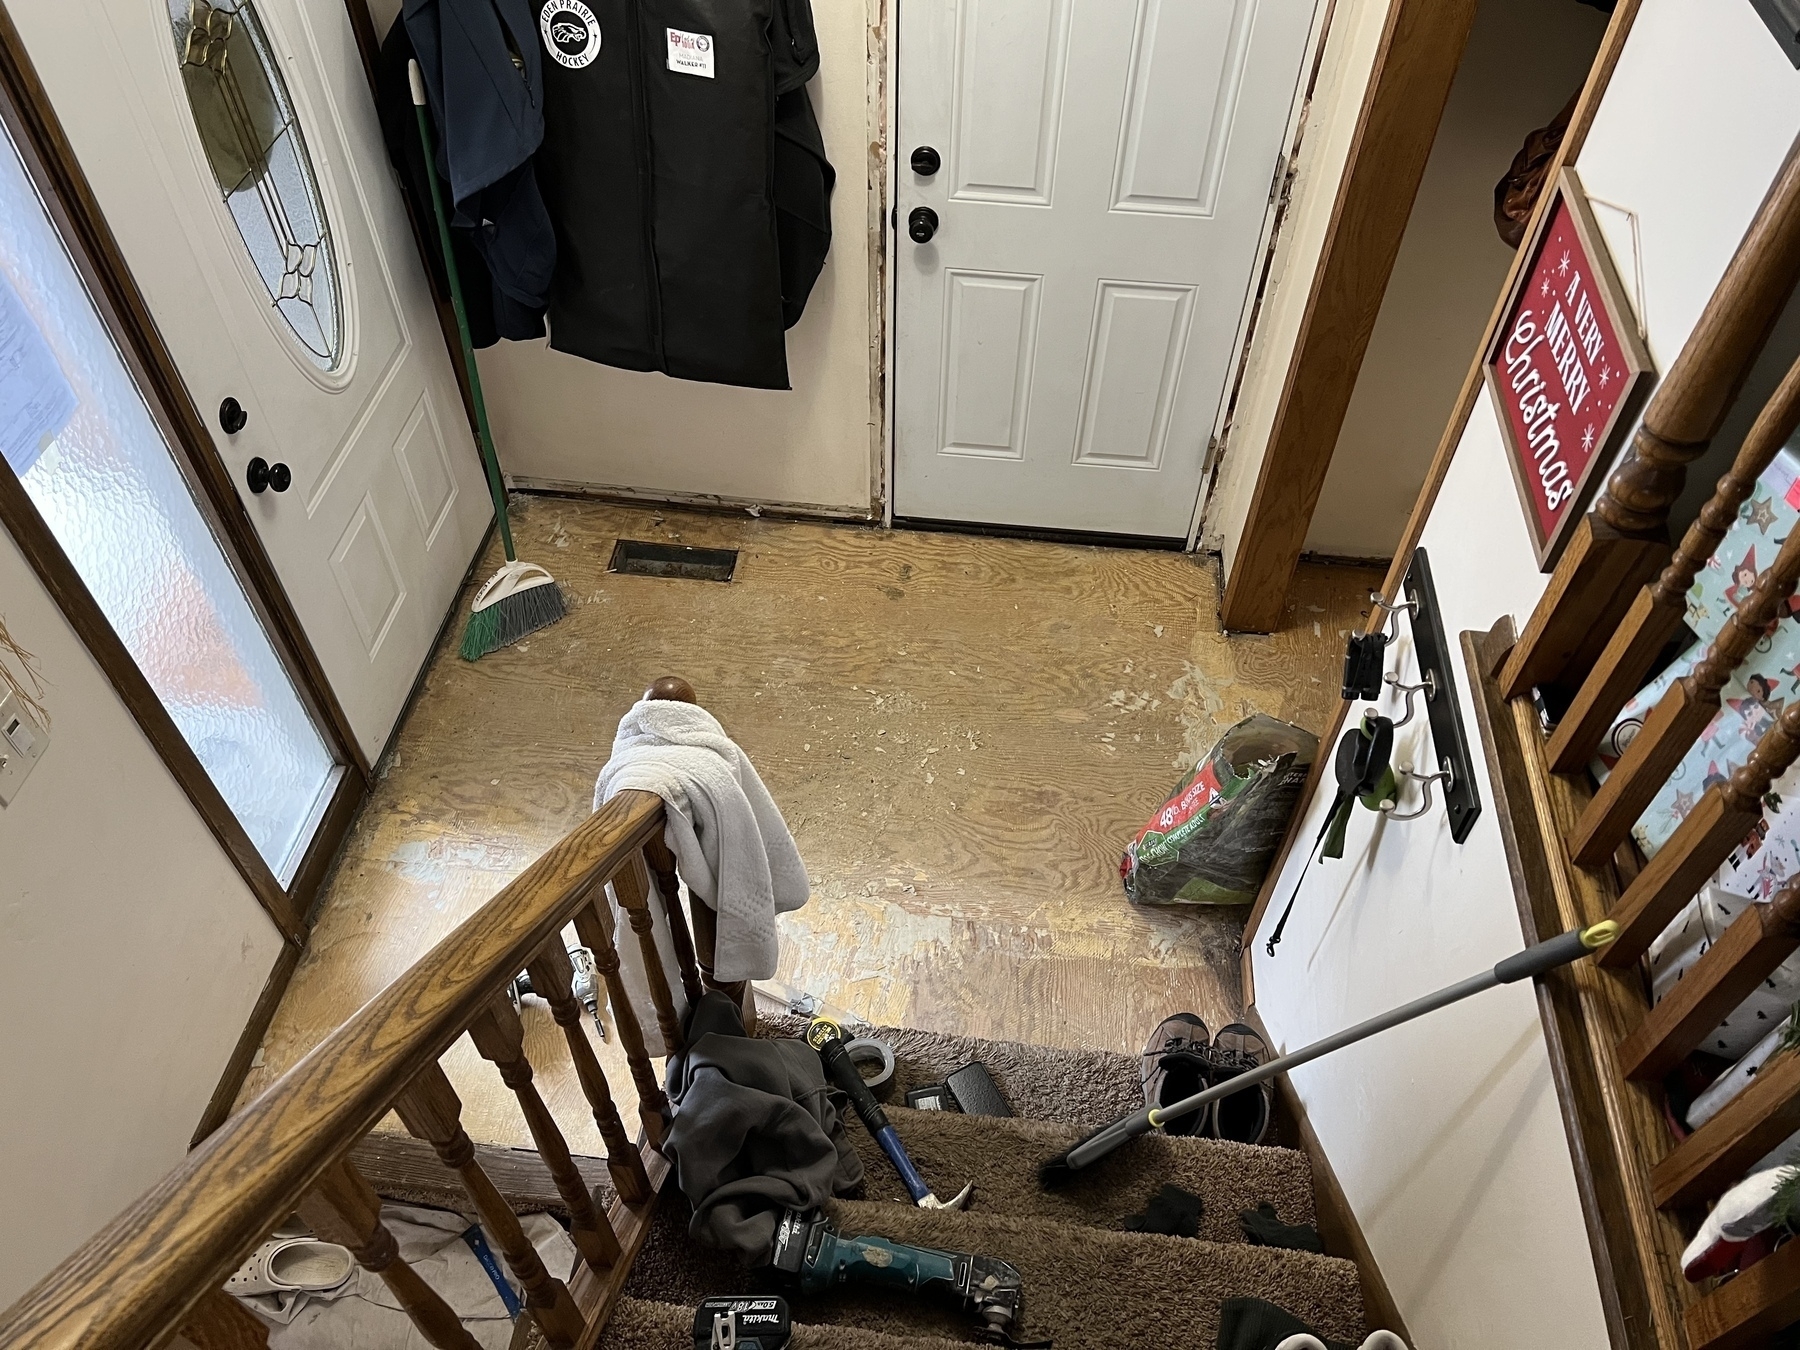
Why have only one project going on at your house when you have have many… Had the contractor move to fixing the entry way floor as he waits for the downstairs bathroom floor to set.
Slowly starting to come back together after painting today…
The task for today… Painting
Projects and Progress continues.. I am not sure why we thought getting so much done all around the same time was a good idea… 🤦♂️
Today was a bust!
It was supposed to be a day to get stuff done or at least just relax as the only things we had on was something in the morning and then evening. However, we were getting some new doors delivered for the upstairs and I have someone lined up to install them on Monday. Then as a perfect storm, the delivery people dropped it off when I wasn’t home and once I got home I found out they were not the doors I was thinking I purchased 🤦🏻♂️. Hoping they had made a mistake I quickly realized checking my email that I did indeed order the wrong doors. I kind of blame the store as I had everything in my online cart and then for some reason it got cleared so then I was trying to redo it and instead of getting prestained boards I got the ready-to-stain boards.
So this started the day off where instead of not having to do much I drove multiple loads to the store to return them and then buy the ones I could in stock. Out of 7, I was able to buy 5 of them and 2 are now coming in later as they were “special deliver”. The best part of those two special delivery doors is the two wrong ones that did get delivered I had to pay a 25% restocking fee… ouch! Overall I made 2 trips to the store with the incorrect doors and I was luckily (since it was only 5 of the 7) able to get those back in 1 trip at the end but might have been two if I couldn’t have fit them all in the van.
Let’s just say it was an overall waste of my resources today (time + money). I guess I at least have something for our person to install on Monday but now I am going to have to wait another week for the last two doors.
Even when I don’t do the house projects myself I somehow have created a mess to deal with.
“Are you done with work yet?” - Doodle 🐶

Using House Projects to help Declutter your Life
In our journey of living a more intentional life by decluttering our belongings and owning less. We have recently found out that house projects have helped us make larger strides in this overall journey.
Owning an older house provides you with lots of fun opportunities to work on projects that might include: updating rooms by painting or carpeting; discovering issues or fixing leaks that need a professional or home handyman; or even just finding a room that needs a full remodel like an outdated kitchen.
My wife and I have done all of the above over the last 9 years we have lived in our house. The worst part of any housing project is that you have to move all of your belongings from the area the project is taking place to another area. For most of our house projects up till a couple years ago, we would move everything from one place to another and then move it ALL back once we were done.
However, in the past couple of years, my wife and I have realized that we need to use those disruptions in our normal space and be very mindful of what we put back once it is all done. In looking back, we have probably moved every piece of furniture, toys, books, boxes, pictures, or other items from one room to another as kids changed rooms and home projects happened. It would have made too much sense during those moves to time to take the extra couple of minutes to set things aside and only slowly add back what is truly needed.
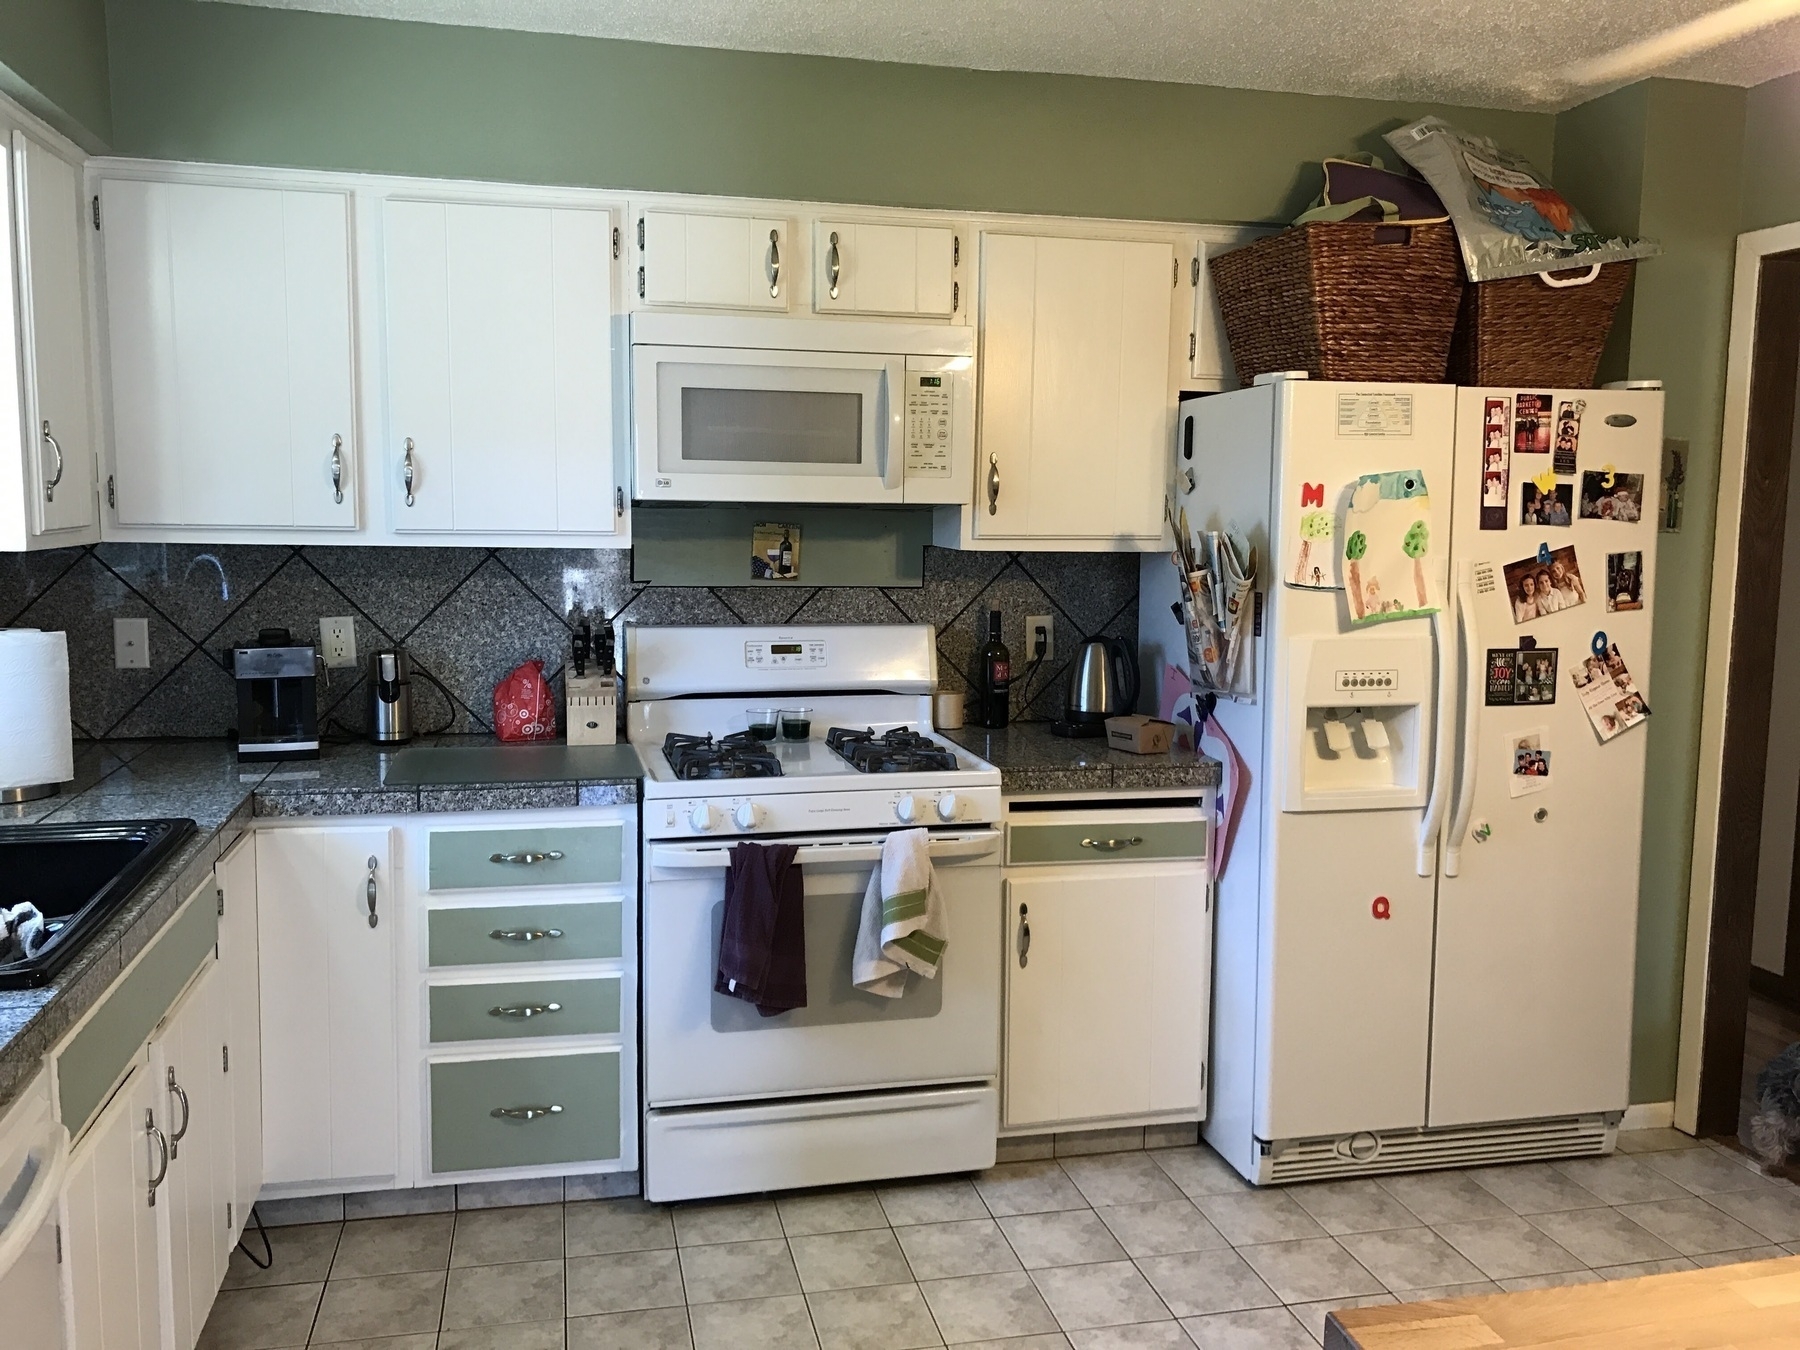
It probably wasn't until this latest project of our Kitchen remodel that we really took hold of this idea. We moved everything out of our Kitchen, Dining Room, and Living room as we had the wall separating all of those removed. It was a messy process that allows our family of 5 to get really cozy in the basement that only has 2 bedrooms.
Ultimately, the process by which we packed everything away but the couple single sets of kitchen stuff we needed follows that of what Ryan from The Minimalists described as a packing party. However, I am always under the mindset that you don’t really need a term or reason, you just need to figure out what works well for you. We are still on this long journey of slowly decluttering room by room and figuring out what makes sense for our family of 5 as we cannot take on too much at once or it would be utter chaos in our life.
Once our kitchen was finished and it was time to move everything back in we only moved in things we needed and made sure it had a purpose. For the kitchen, this was really easy as everything was in boxes we only brought stuff out that we used for cooking on a daily or weekly basis. A couple things we noticed during this process were:
There were lots of other examples of that were we just had lots or multiples of items that we didn’t need to continue to keep around cluttering up shelves or drawers.
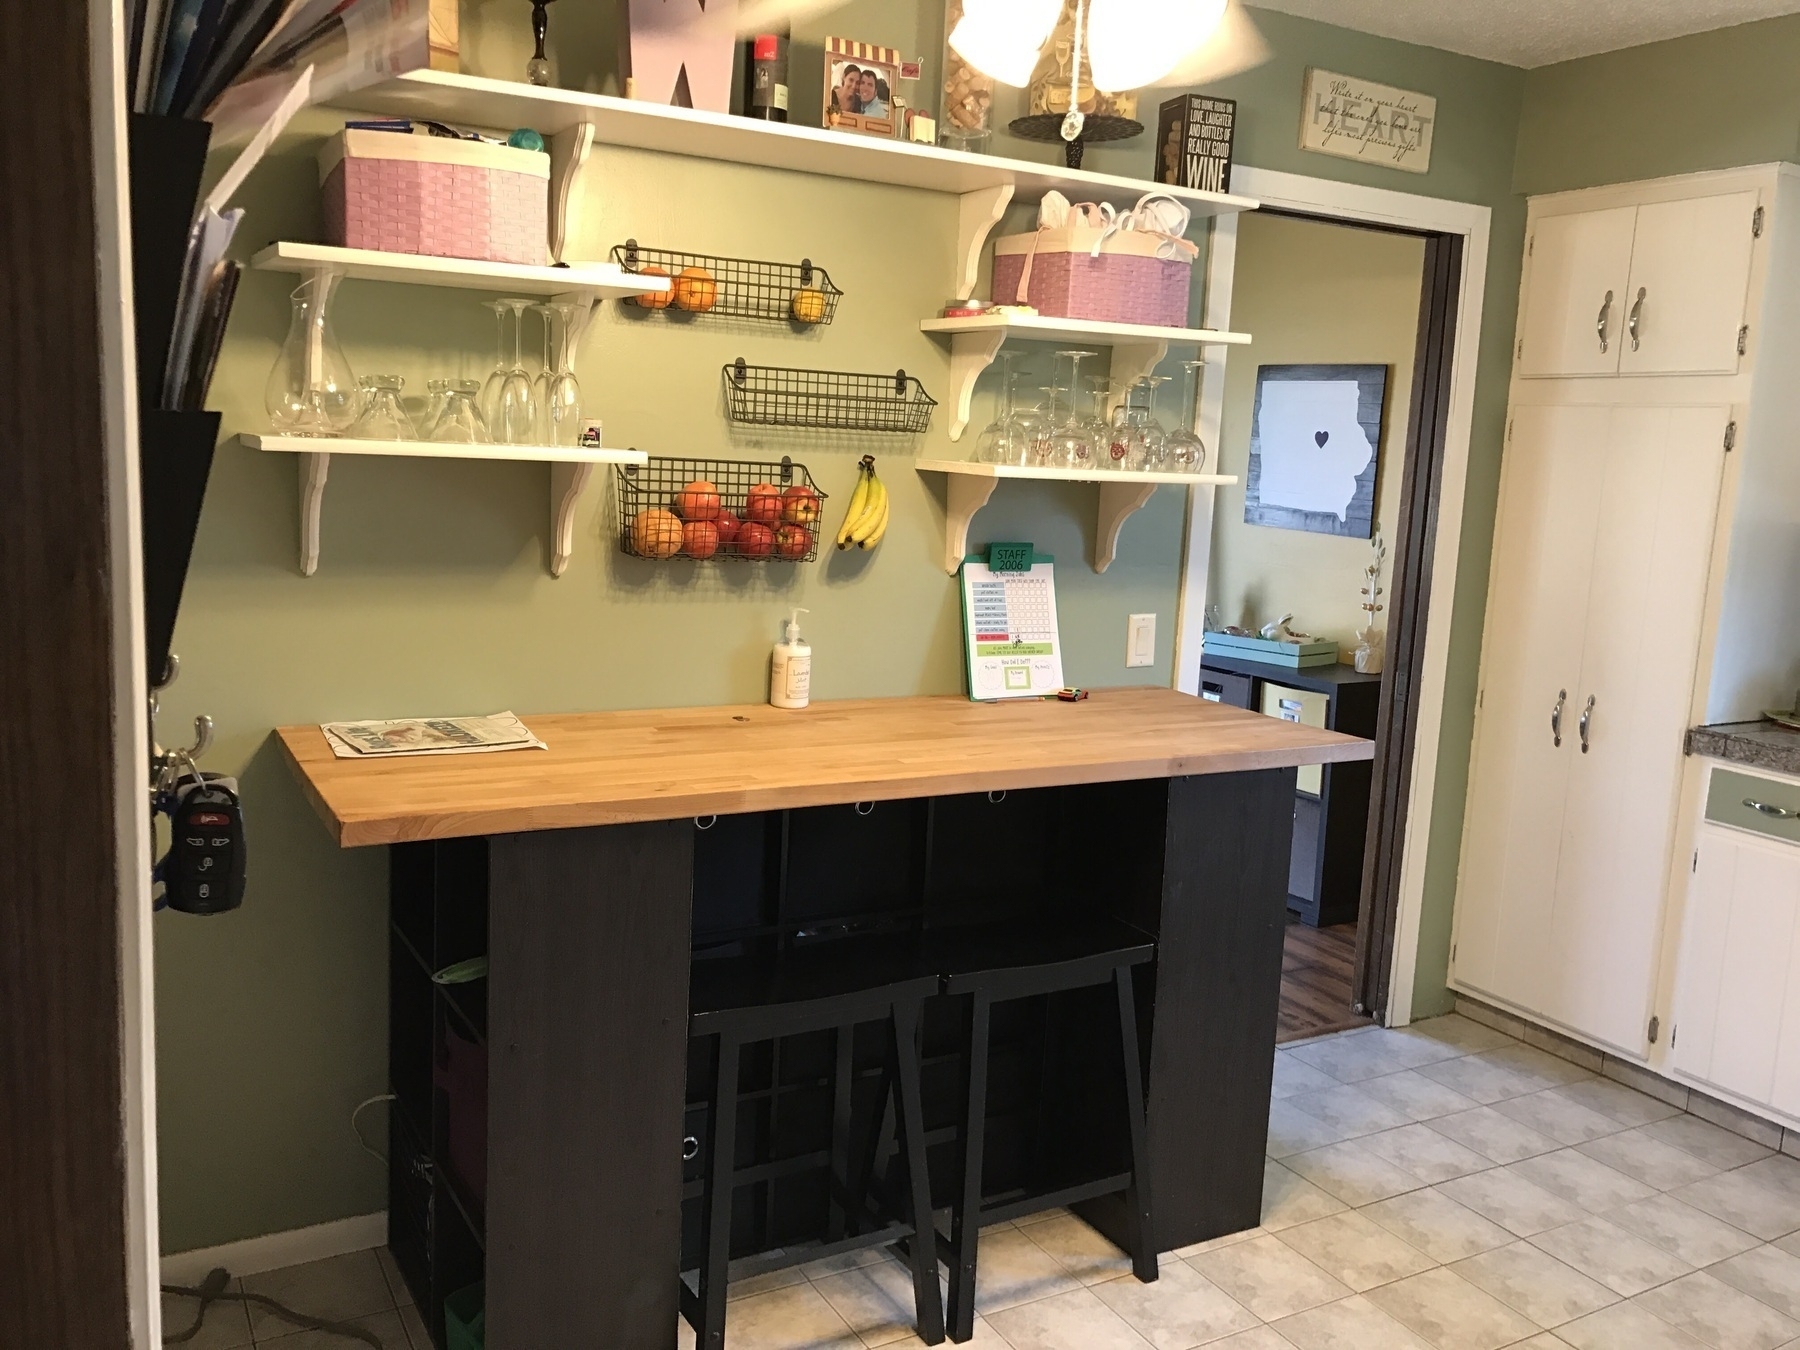
In the living and dining rooms, our goal was to remove excess furniture and things on the wall to get a more minimalistic look. By removing excess furniture and having floor space, it allows us to now clean up more quickly. Not only is it a new space, where I enjoy the open floor plan, but I really enjoy having less stuff in the room. I feel like a burden has been lifted off us and it seems much more peaceful to enjoy. As I look around there is less to clean around and more space to just have fun with the kids and not have it feel so cramped because of the stuff we owned. One of the bigger changes we made during this time was to not keep any toys in the upstairs living room. That doesn’t mean the kids don’t bring their toys there to play or use the dining room table to draw, color, or play with play-doh on. It really just meant that we didn’t want that stuff to be stored in the living room as we found before that led to creating more mess. To accomplish this, we made sure those items previously stored in the living room that the kids wanted to keep had a place in their bedrooms or the toy room downstairs.
Before:
After:

As you can tell we couldn’t be happier with the space and are looking forward to enjoying it for years to come. Even though the remodel was a big project in itself, I feel a great side effect of it was that we were able to pack everything away and then Intentionally choose what to bring back into our living space.
Once we had our living space set up as we liked it and brought back the items we felt were a good fit in our life, we donated the rest. This is another crucial step as you don’t want to be hanging on to boxes or stuff in another place of the house. I understand that you might not want to get rid of those items right away and if that is you, I would suggest you set a calendar reminder to find that box(es) buried in the garage that you need to donate at a specific date in the future.
Have you had a housing remodel or project in the past and found it a good time to declutter items? If so I would love to hear how it went for you and if you think it was successful. If not and you have a project on the horizon let me know about it and share your success after it is all done.
 *Completed Kitchen Remodel (Day 44, June 2017)*
All house projects are not created equal - Replacing interior Doors
Replacing interior doors in your house should not be a hard task to accomplish. Just measure the rough opening, purchase a new door that should fit in the rough opening, and then install the new door in a matter of minutes. However, if your house is like mine and you had previous owners like me you will understand why there is nothing “easy” or “standard” when it comes to house projects.
To spare you the long story I will jump right in that I needed to replace the downstairs bathroom door and jam (frame). Should be an easy task right? Think again. I quickly realized after taking the door and molding off that the rough opening of the door was not even close to a standard size but yet they somehow took a standard door and shoved it into the opening they had. Very classic for my house and I really shouldn’t have expected anything less. So that left me with two decisions:
 *Perfect fit*
Once the frame nice and snug in the rough opening it was time to cut the door down to size as of course it was too tall. Now this is not as tough of a task but since I was using hollow core doors it added to the challenge as I was taking more than 2 inches off the bottom. Which means that the bottom of the door would have been left open as I would be cutting the entire filling piece off. Since this had already happened to me before for some closet doors I replaced I already had a solution.
In order to make a nice cut and not chip your wood up to much I would suggest putting a line of painters tap on both sides. You will probably still have some chipping but it will help reduce it. After you make the cut you will want to clean out the spacing foam/cardboard to make room for a new cap.
 *Inside of the Hollow-Core door*
If you have the right materials around you can cut a new piece of wood for the filler. If that is the case make sure you are measuring from the outside edges and not the center of the hole. Otherwise, another option in a pinch is to use the old filler from the part you cut. However, it takes a little bit of work pealing the outside paneling away without breaking the cap. Either way works as I have done both before. Finally, to secure it in place I would suggest using glue and then tack it with a brad nailer.
Here is the finished product which tuned out nice after spending about 2 hrs more than I had hoped to.


Follow-up: So after writing all of this I decided to see if anyone had a video of a similar process that I took of cutting the hollow-core door. I was in luck as Rick Arnold published a video on FineHomeBuilding that is pretty much identical to what I did.
Remodeling project
Looking back I realized that in the last post I talked about how I was looking for new books to read and I was actually really excited about reading books instead of just listening to book tapes. In fact, I received a copy of “Sleep your way to the Top” by Jane Miller from FGPress not long after publishing that post (perfect timing right). Also, I had some other plans of spending time on some projects that were still very rough ideas in my mind.
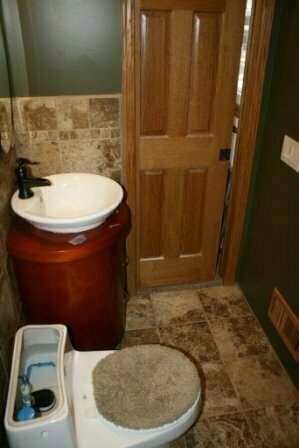
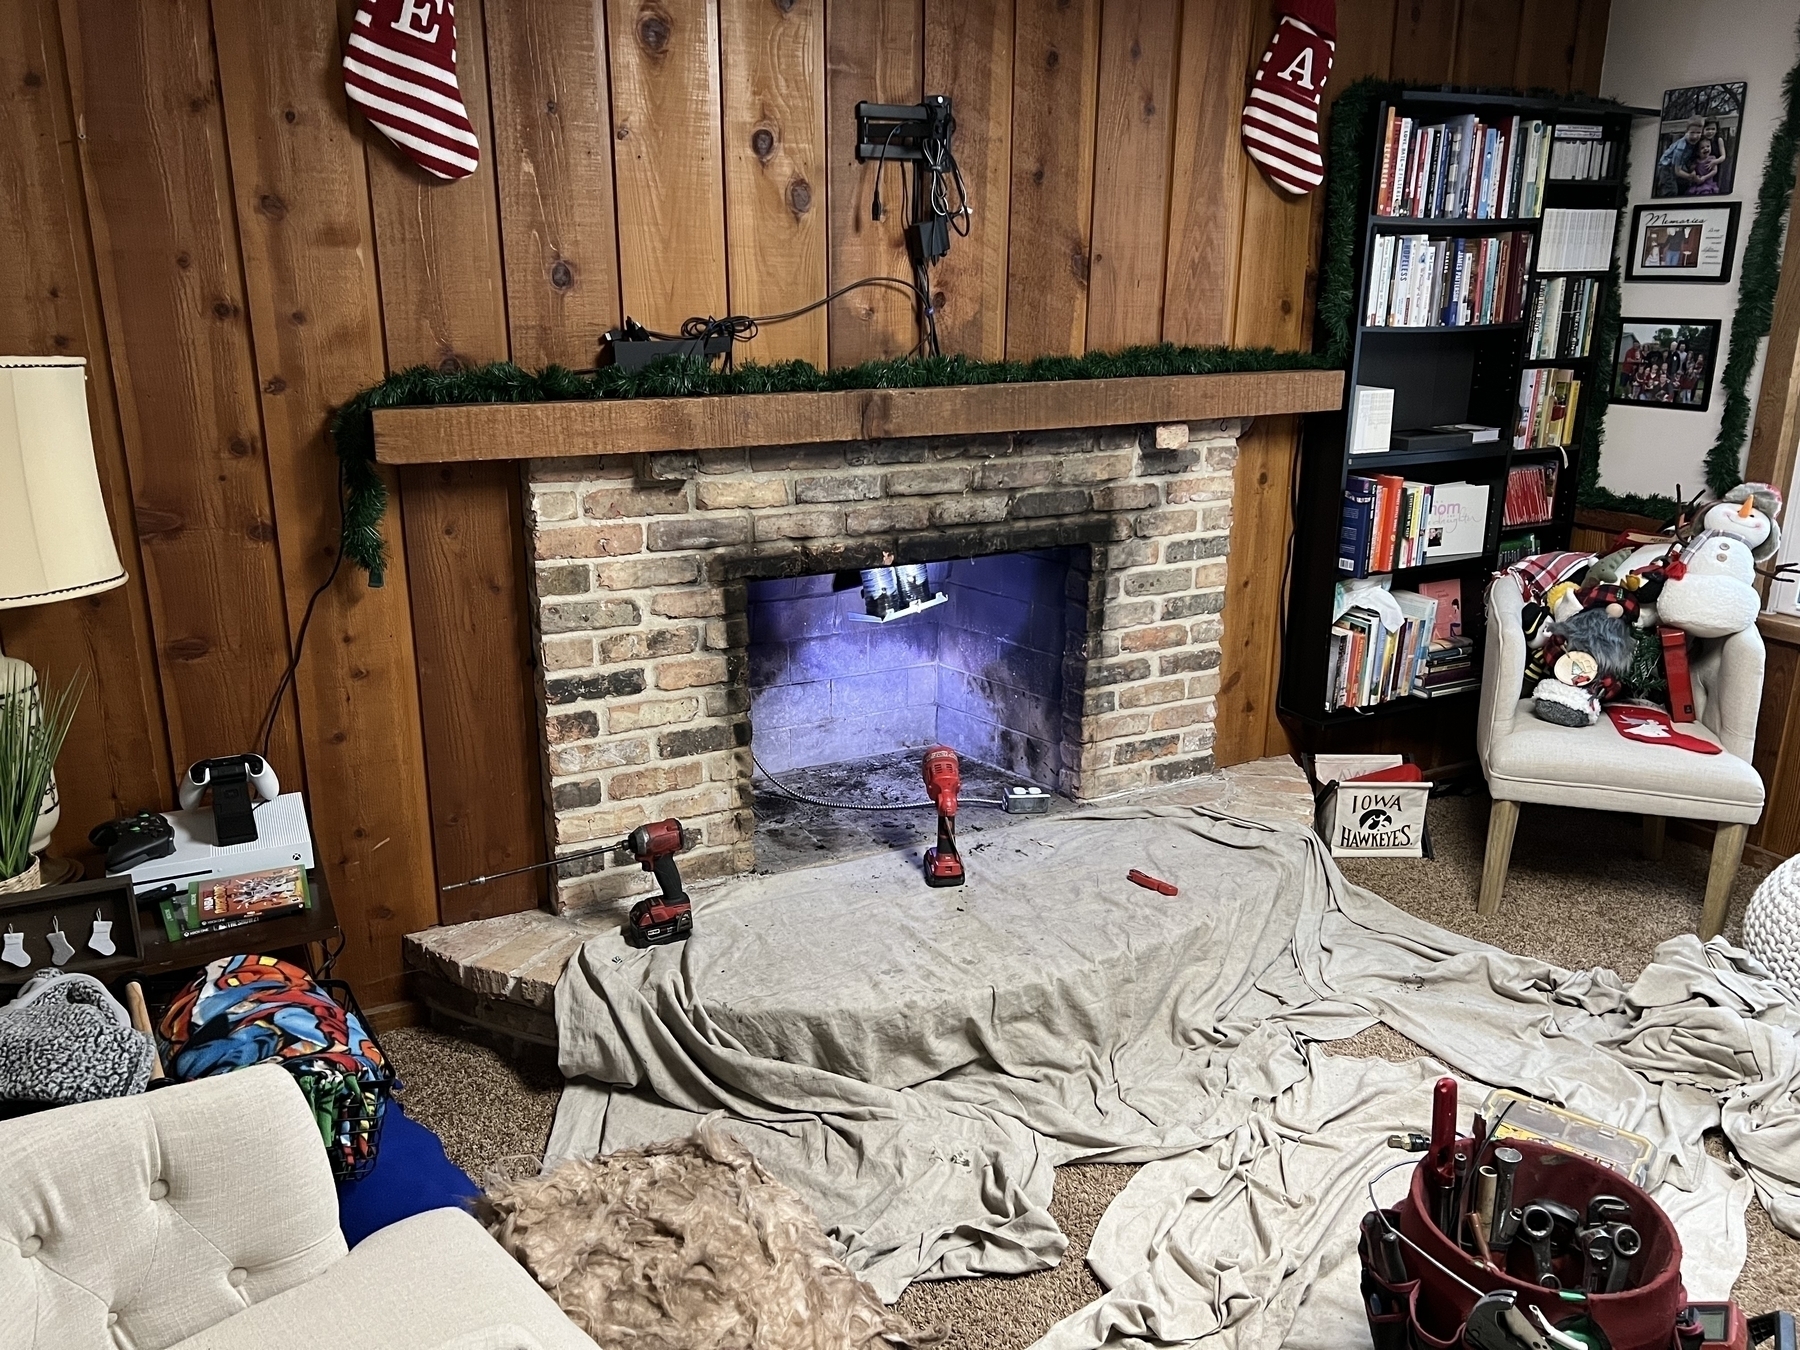
No sooner did all of that happen than I found myself trying to figure out why there was water dripping in our basement from the ceiling. What caused the leak you asked.. Well of course a leaky toilet seal. So I did what every do-it-yourself handyman would do.... I decided to redo the entire bathroom instead of just fixing the leaky Toilet ring. If you are going to do something do it right from the beginning.
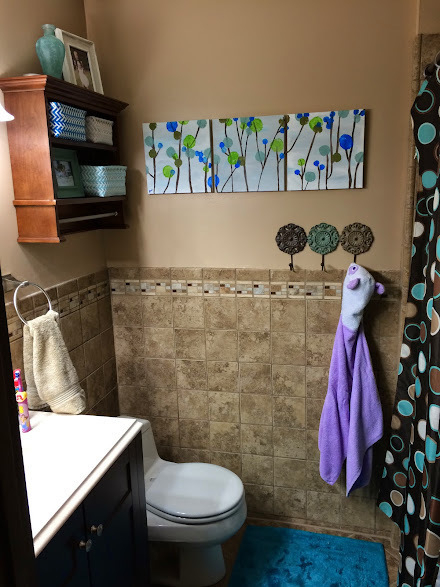 Upstairs Bathroom - Finished Product
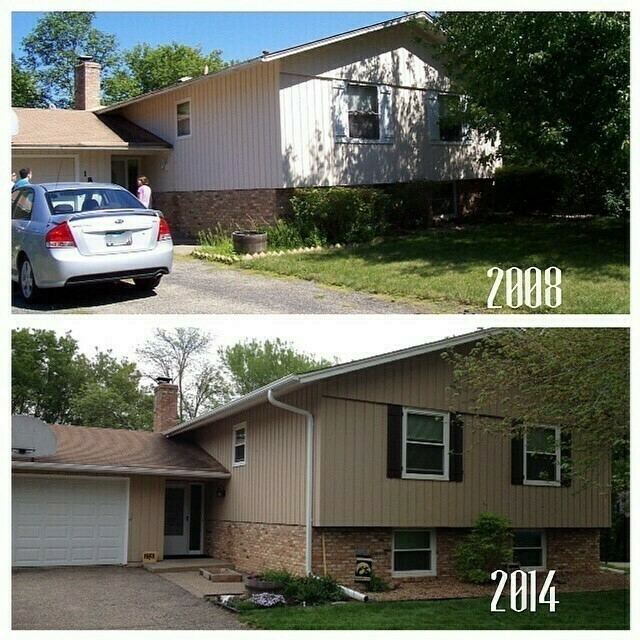
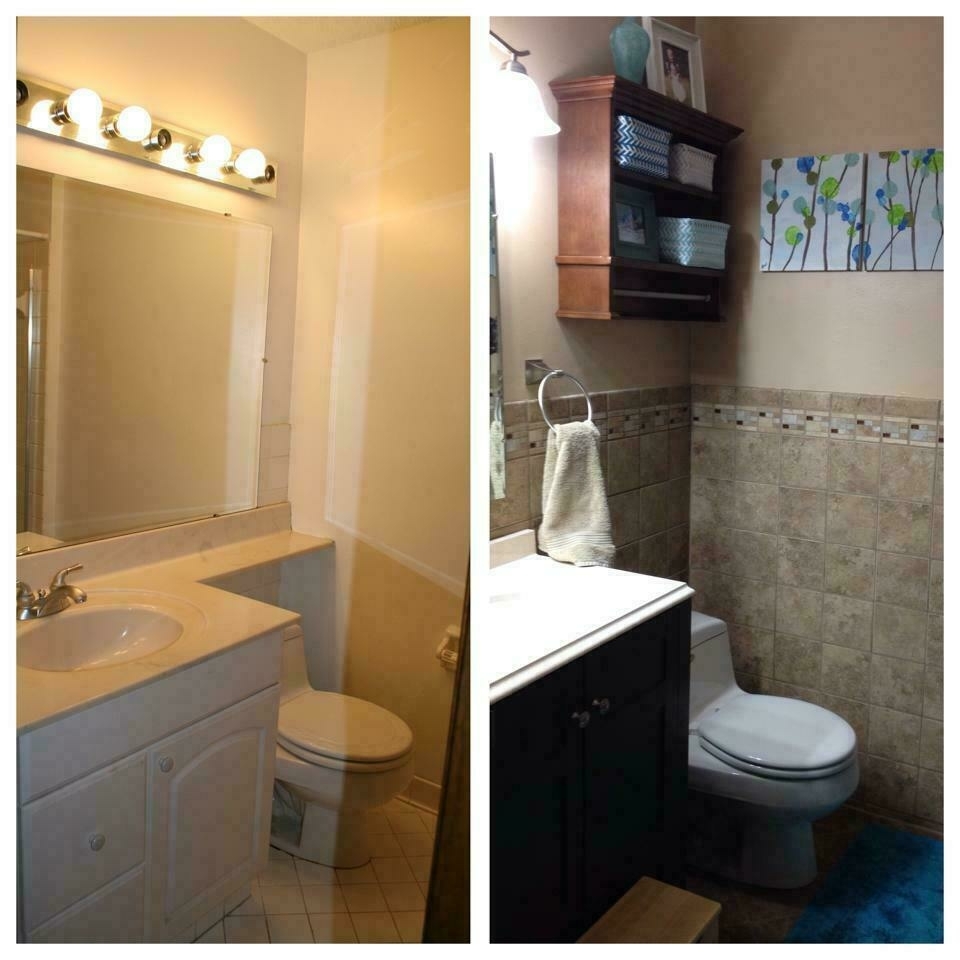 *Before and After*
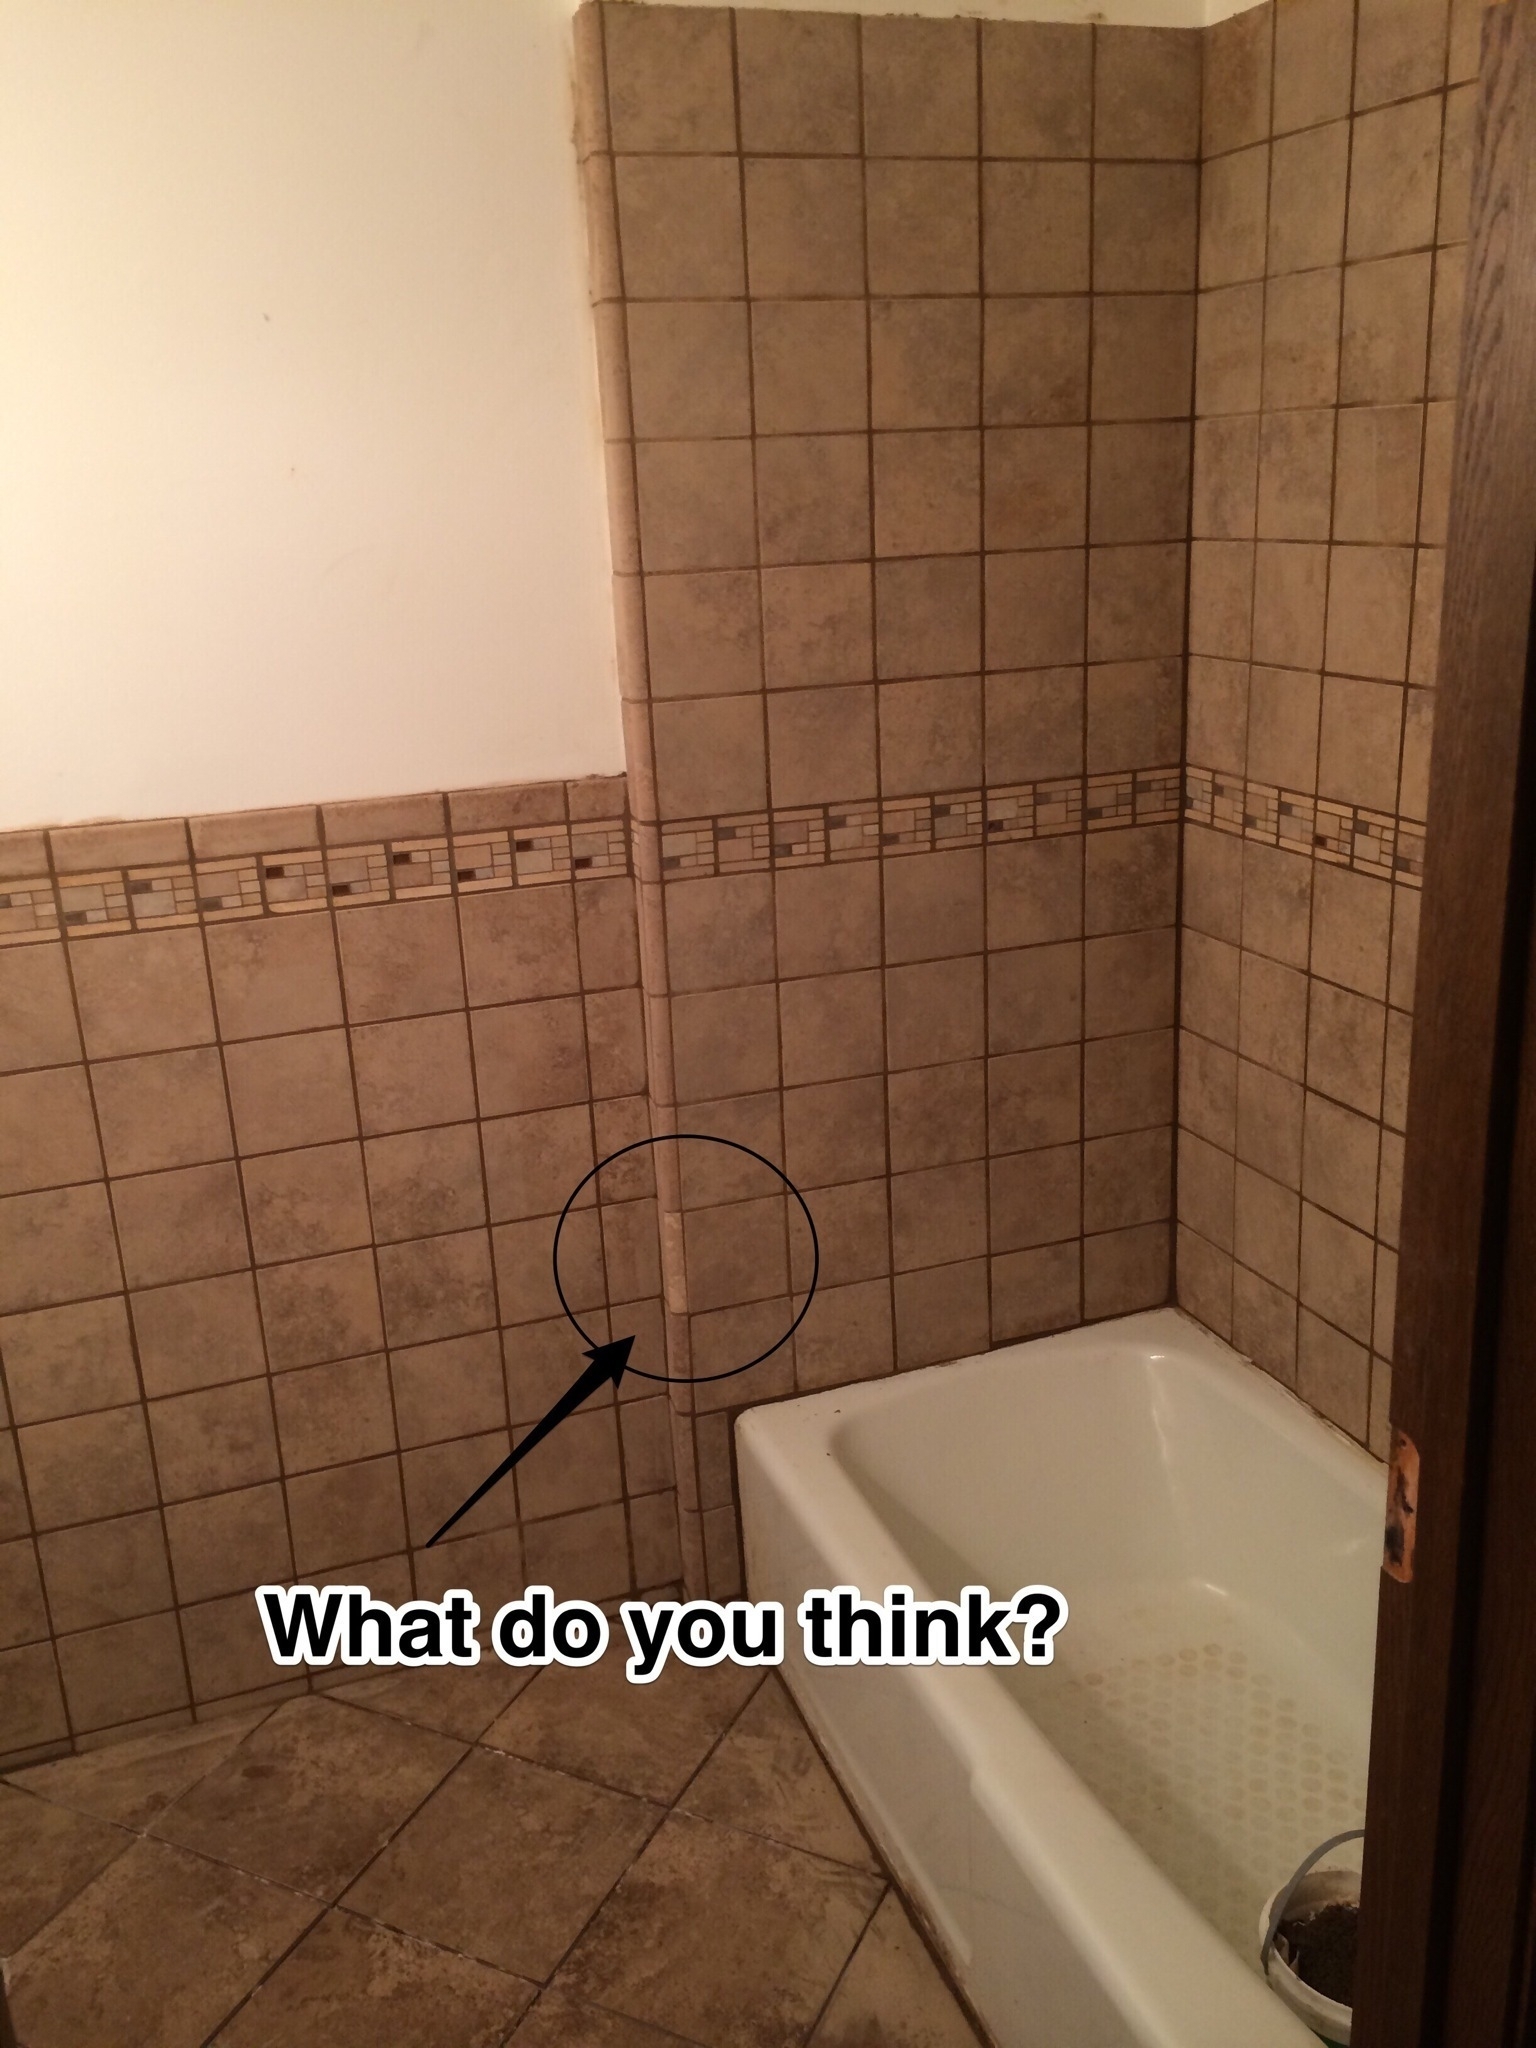
 *Always great to find what the previous owner did. Really shims!*
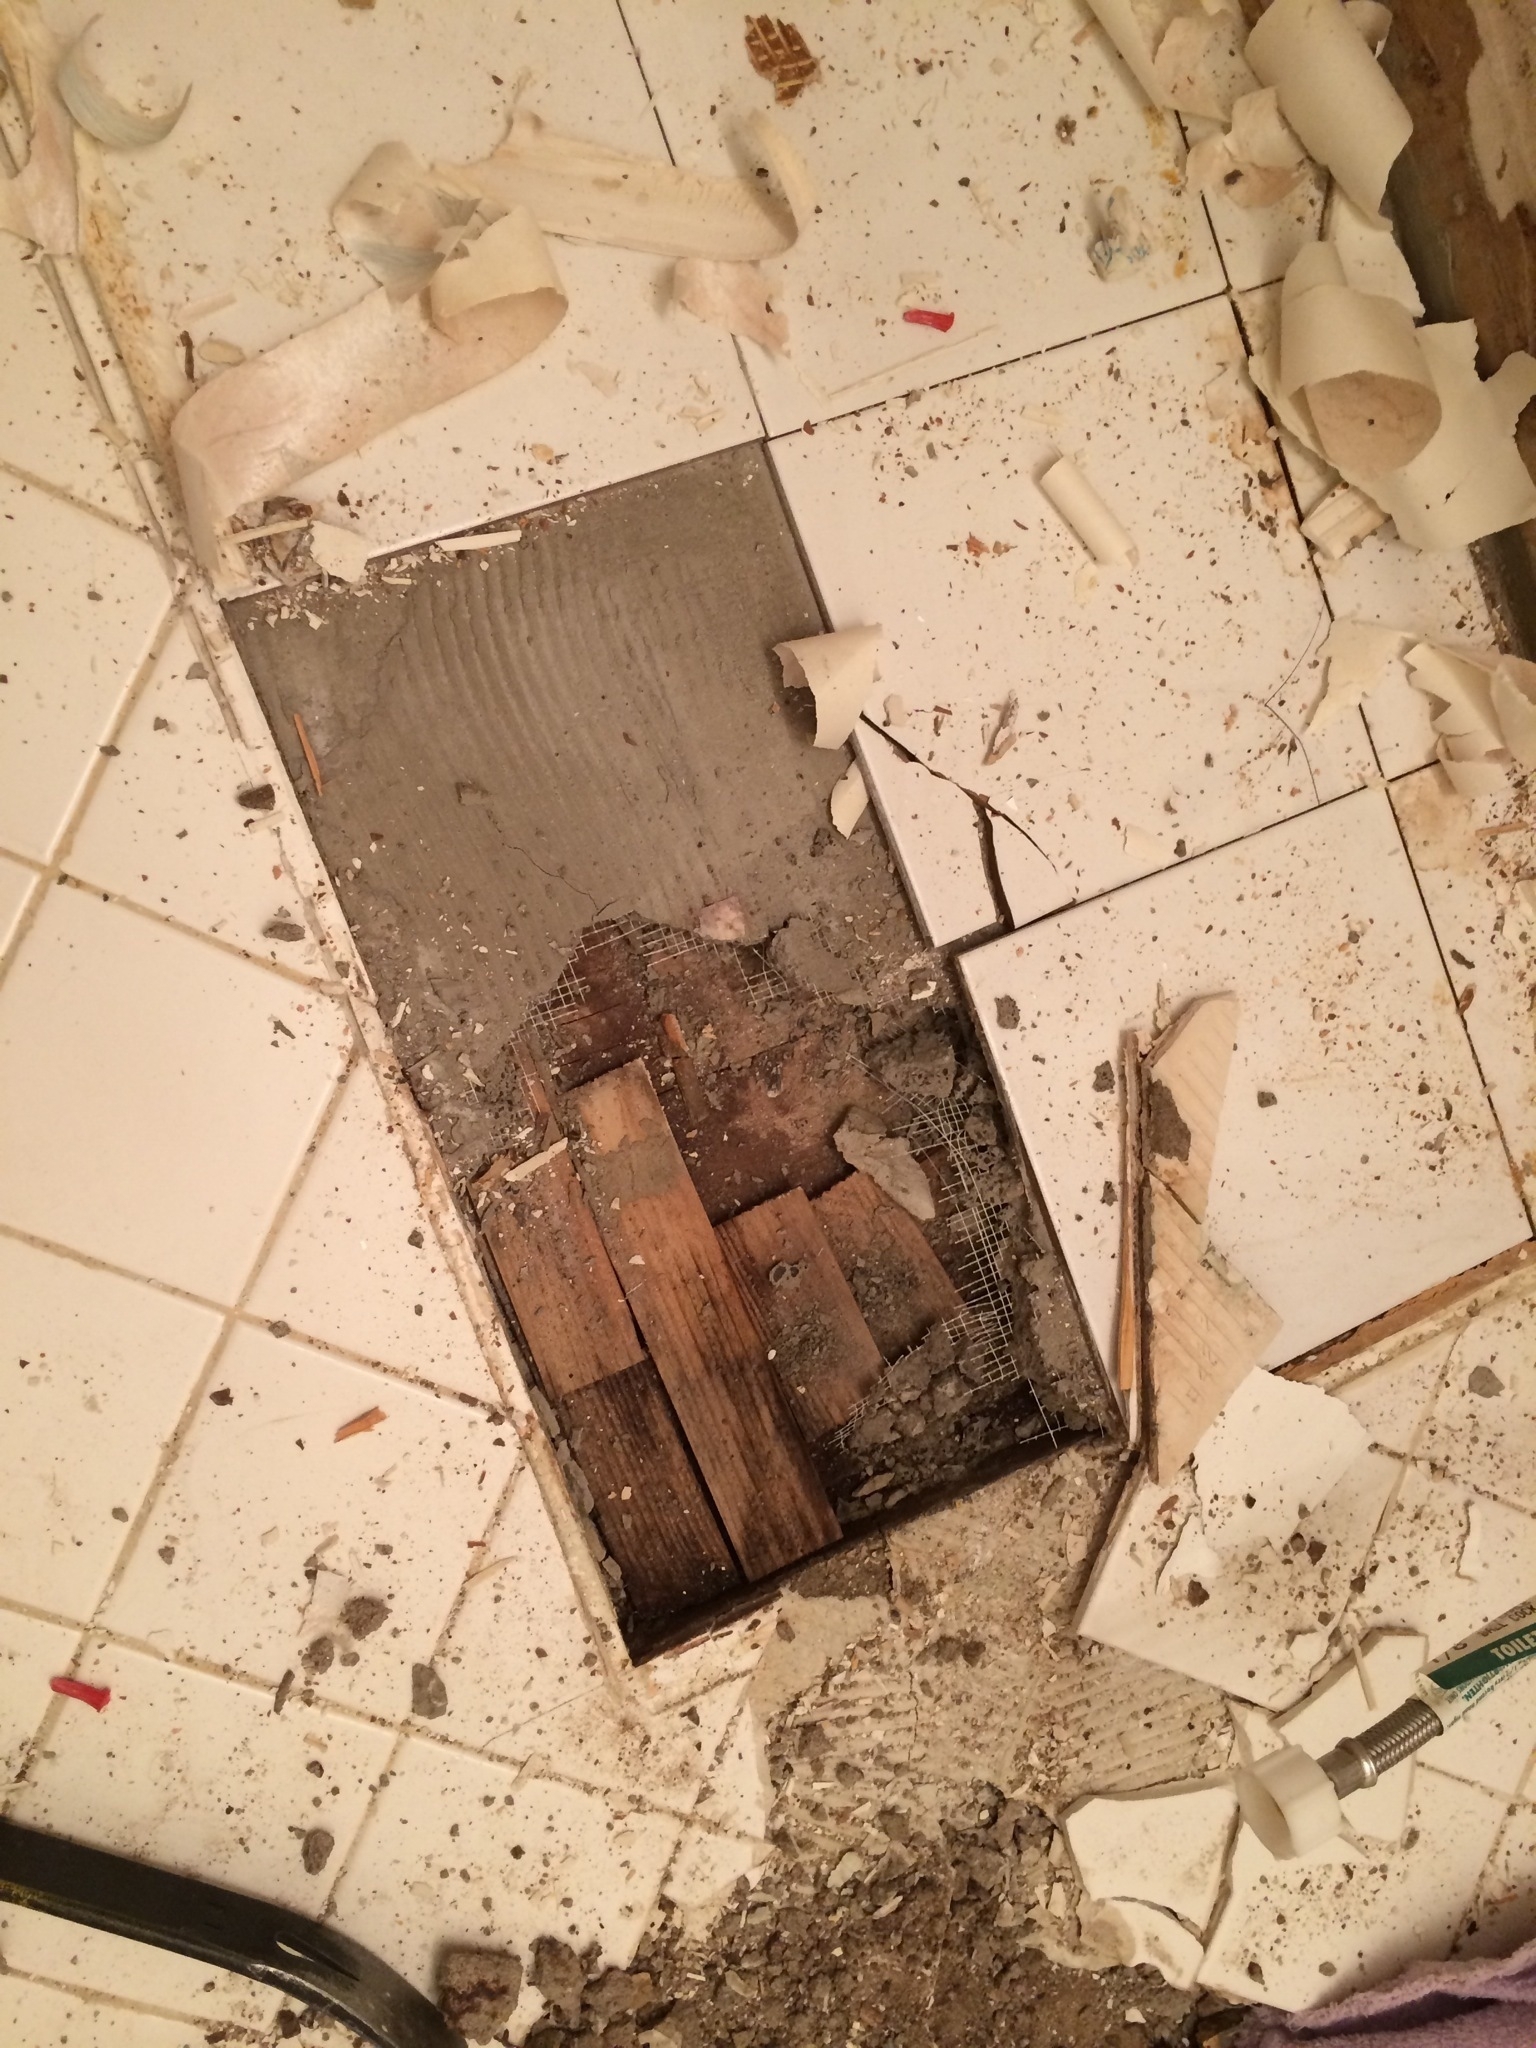
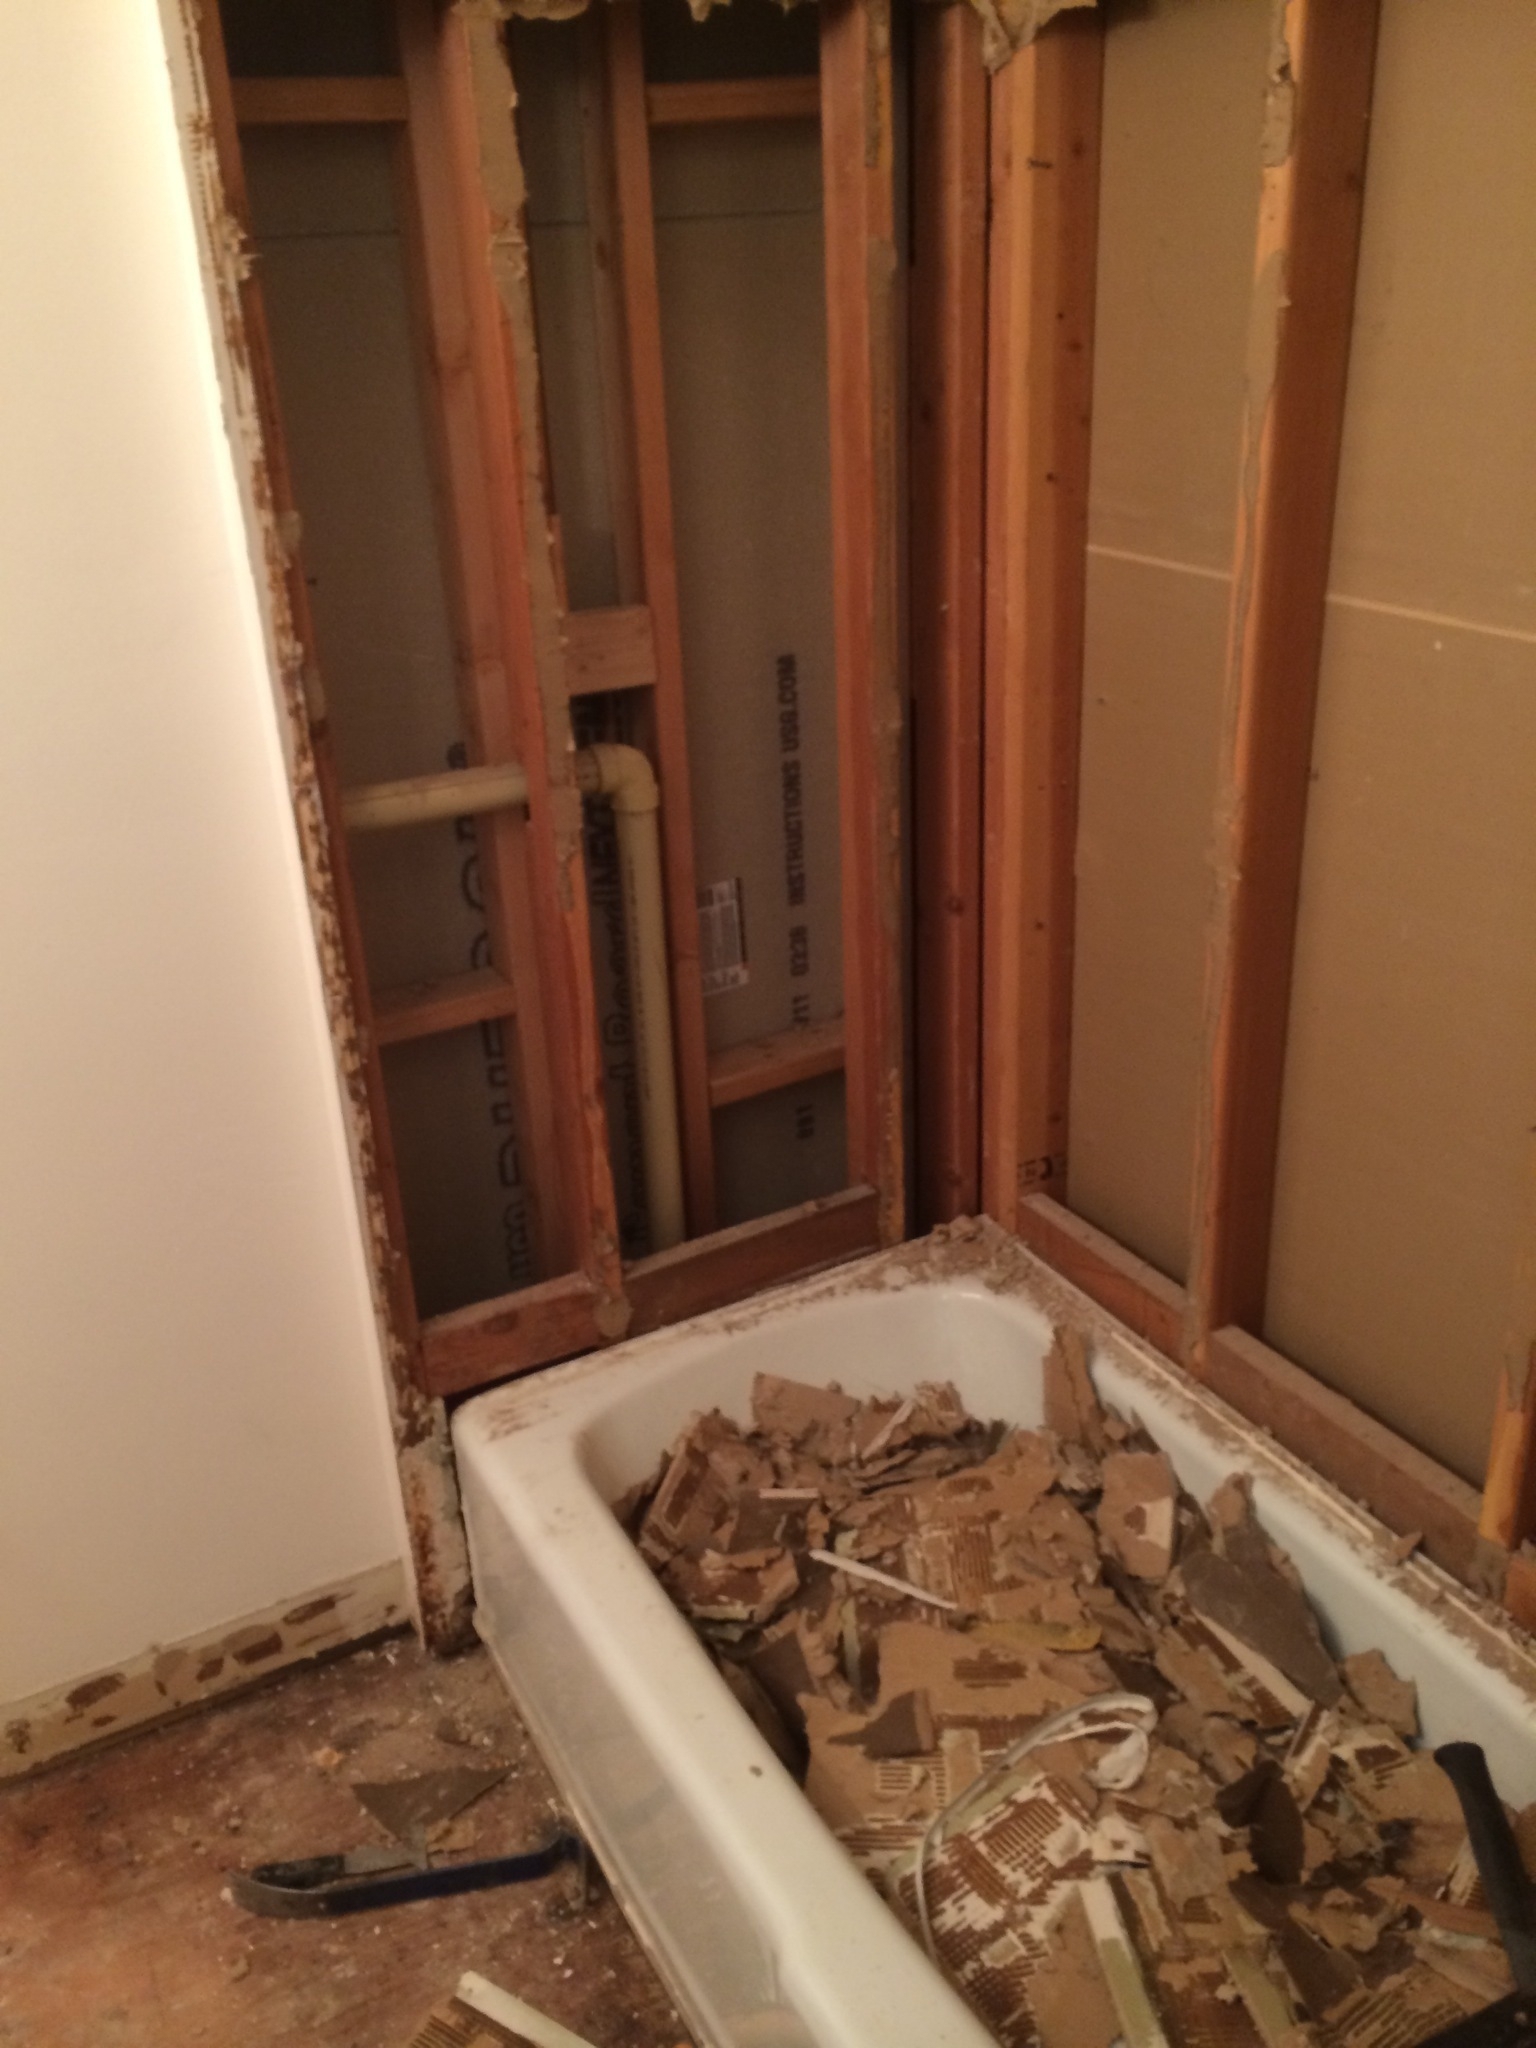 *Demolition almost complete*
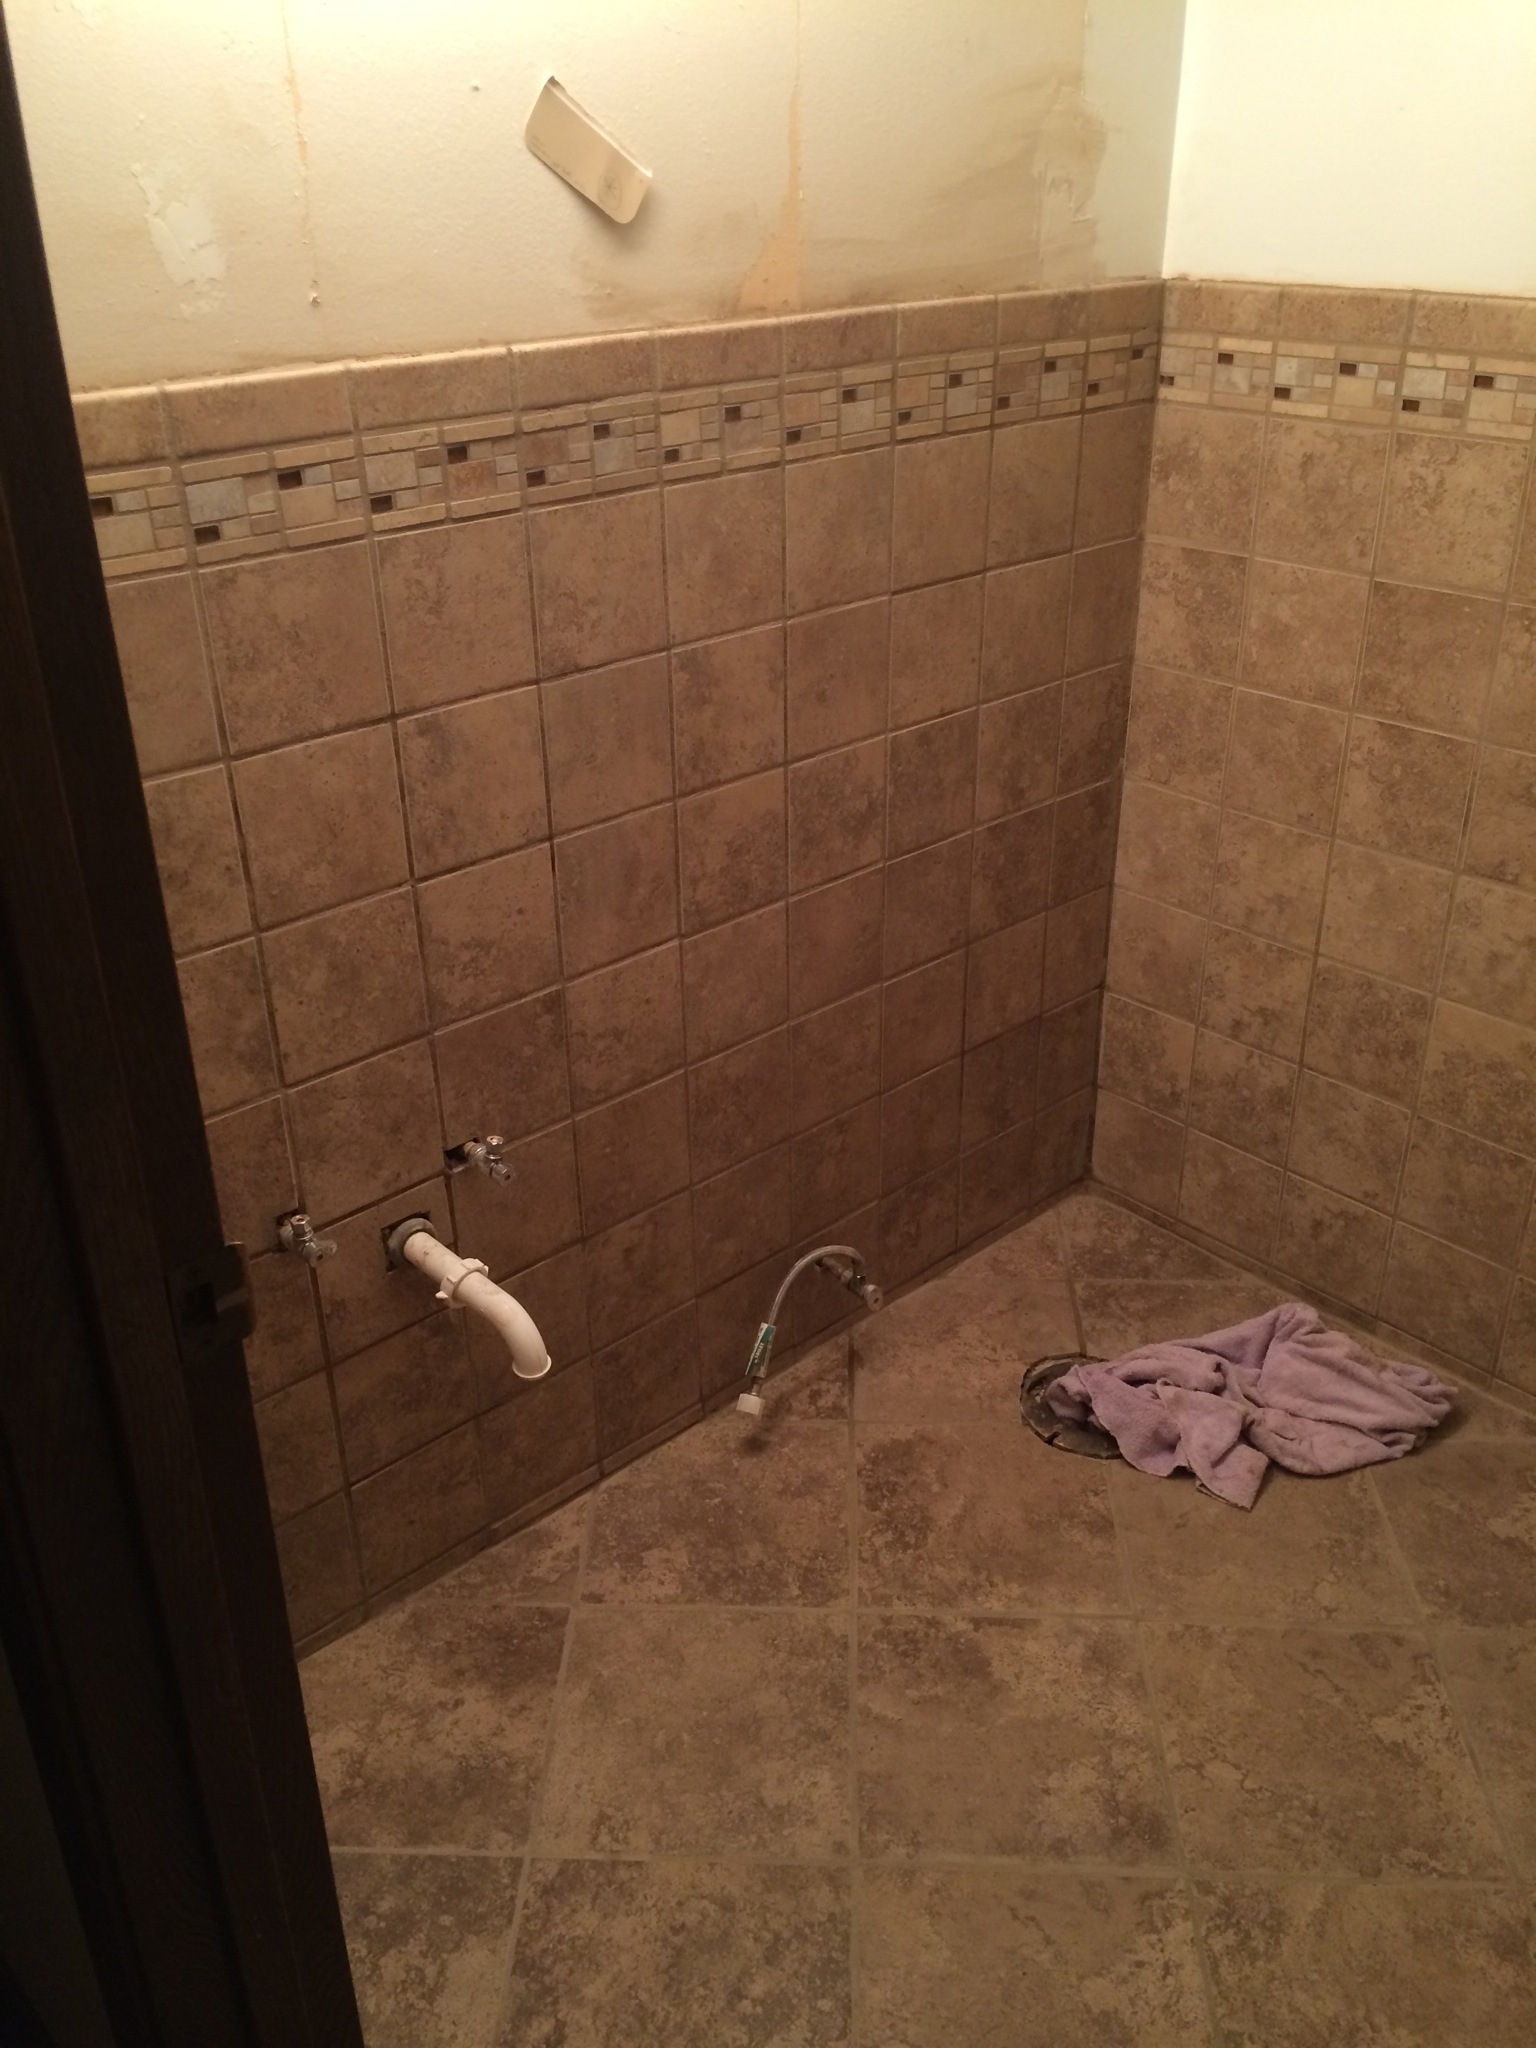
 *Replacing the floor*
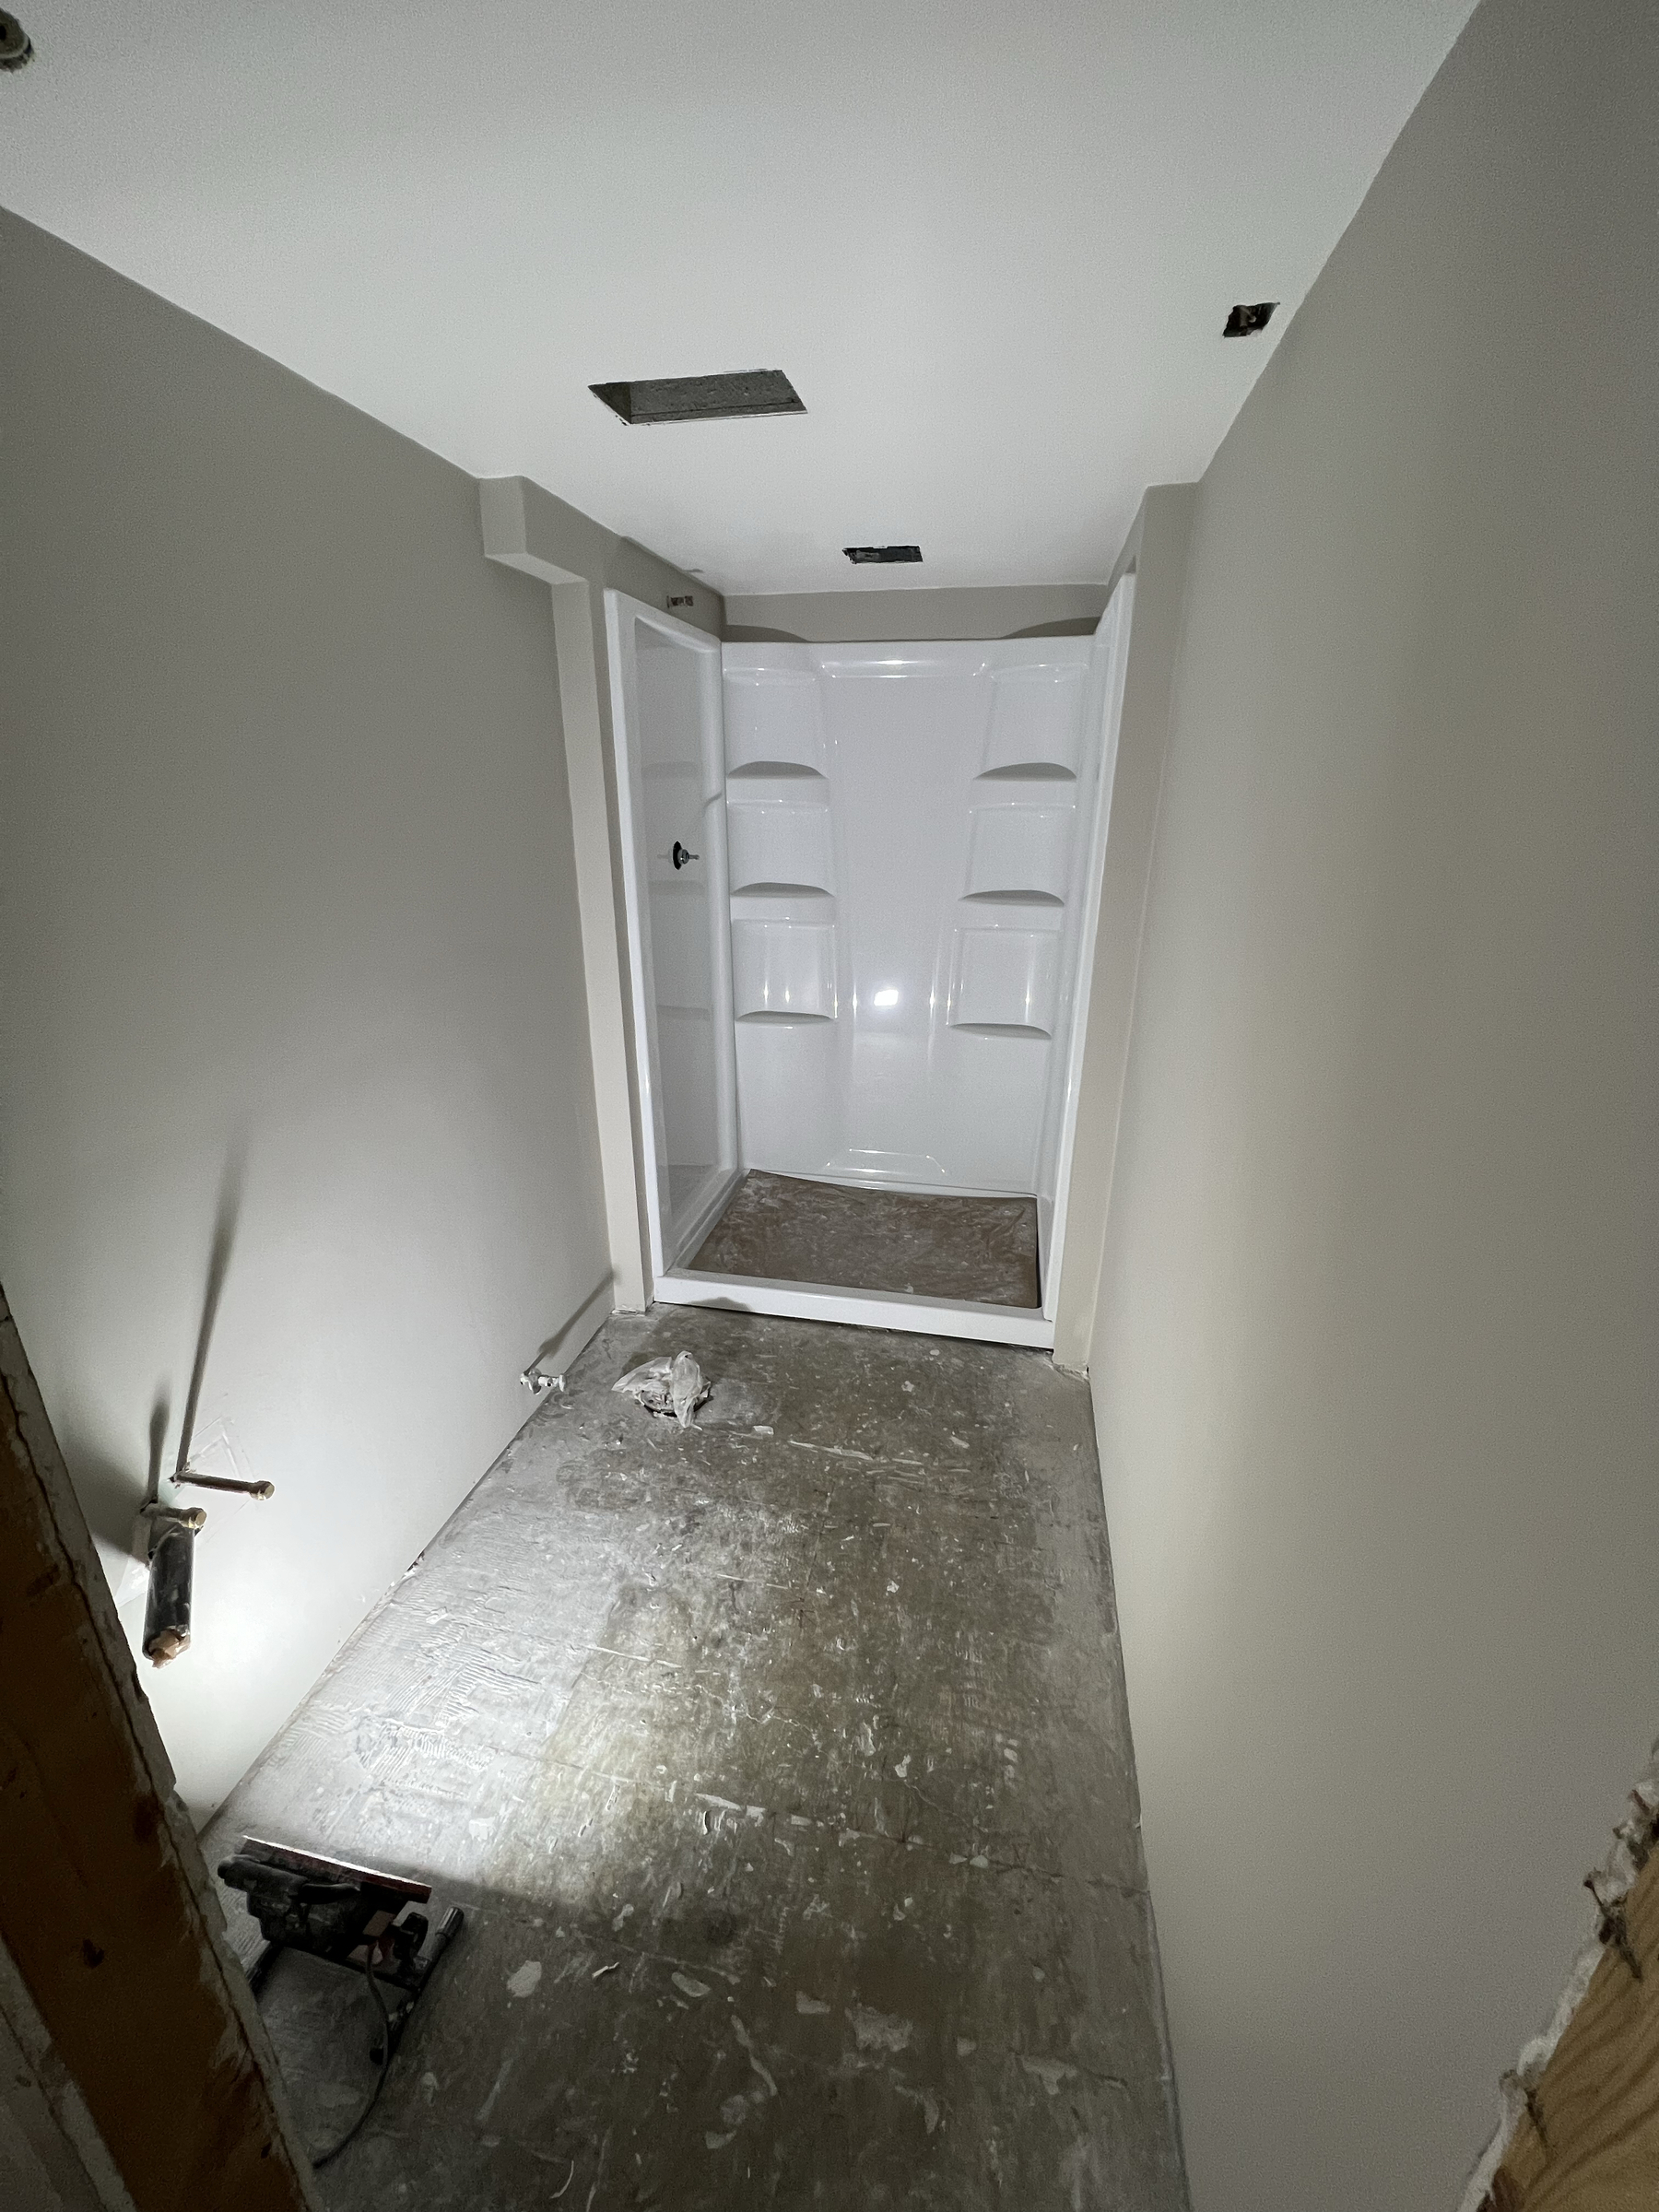
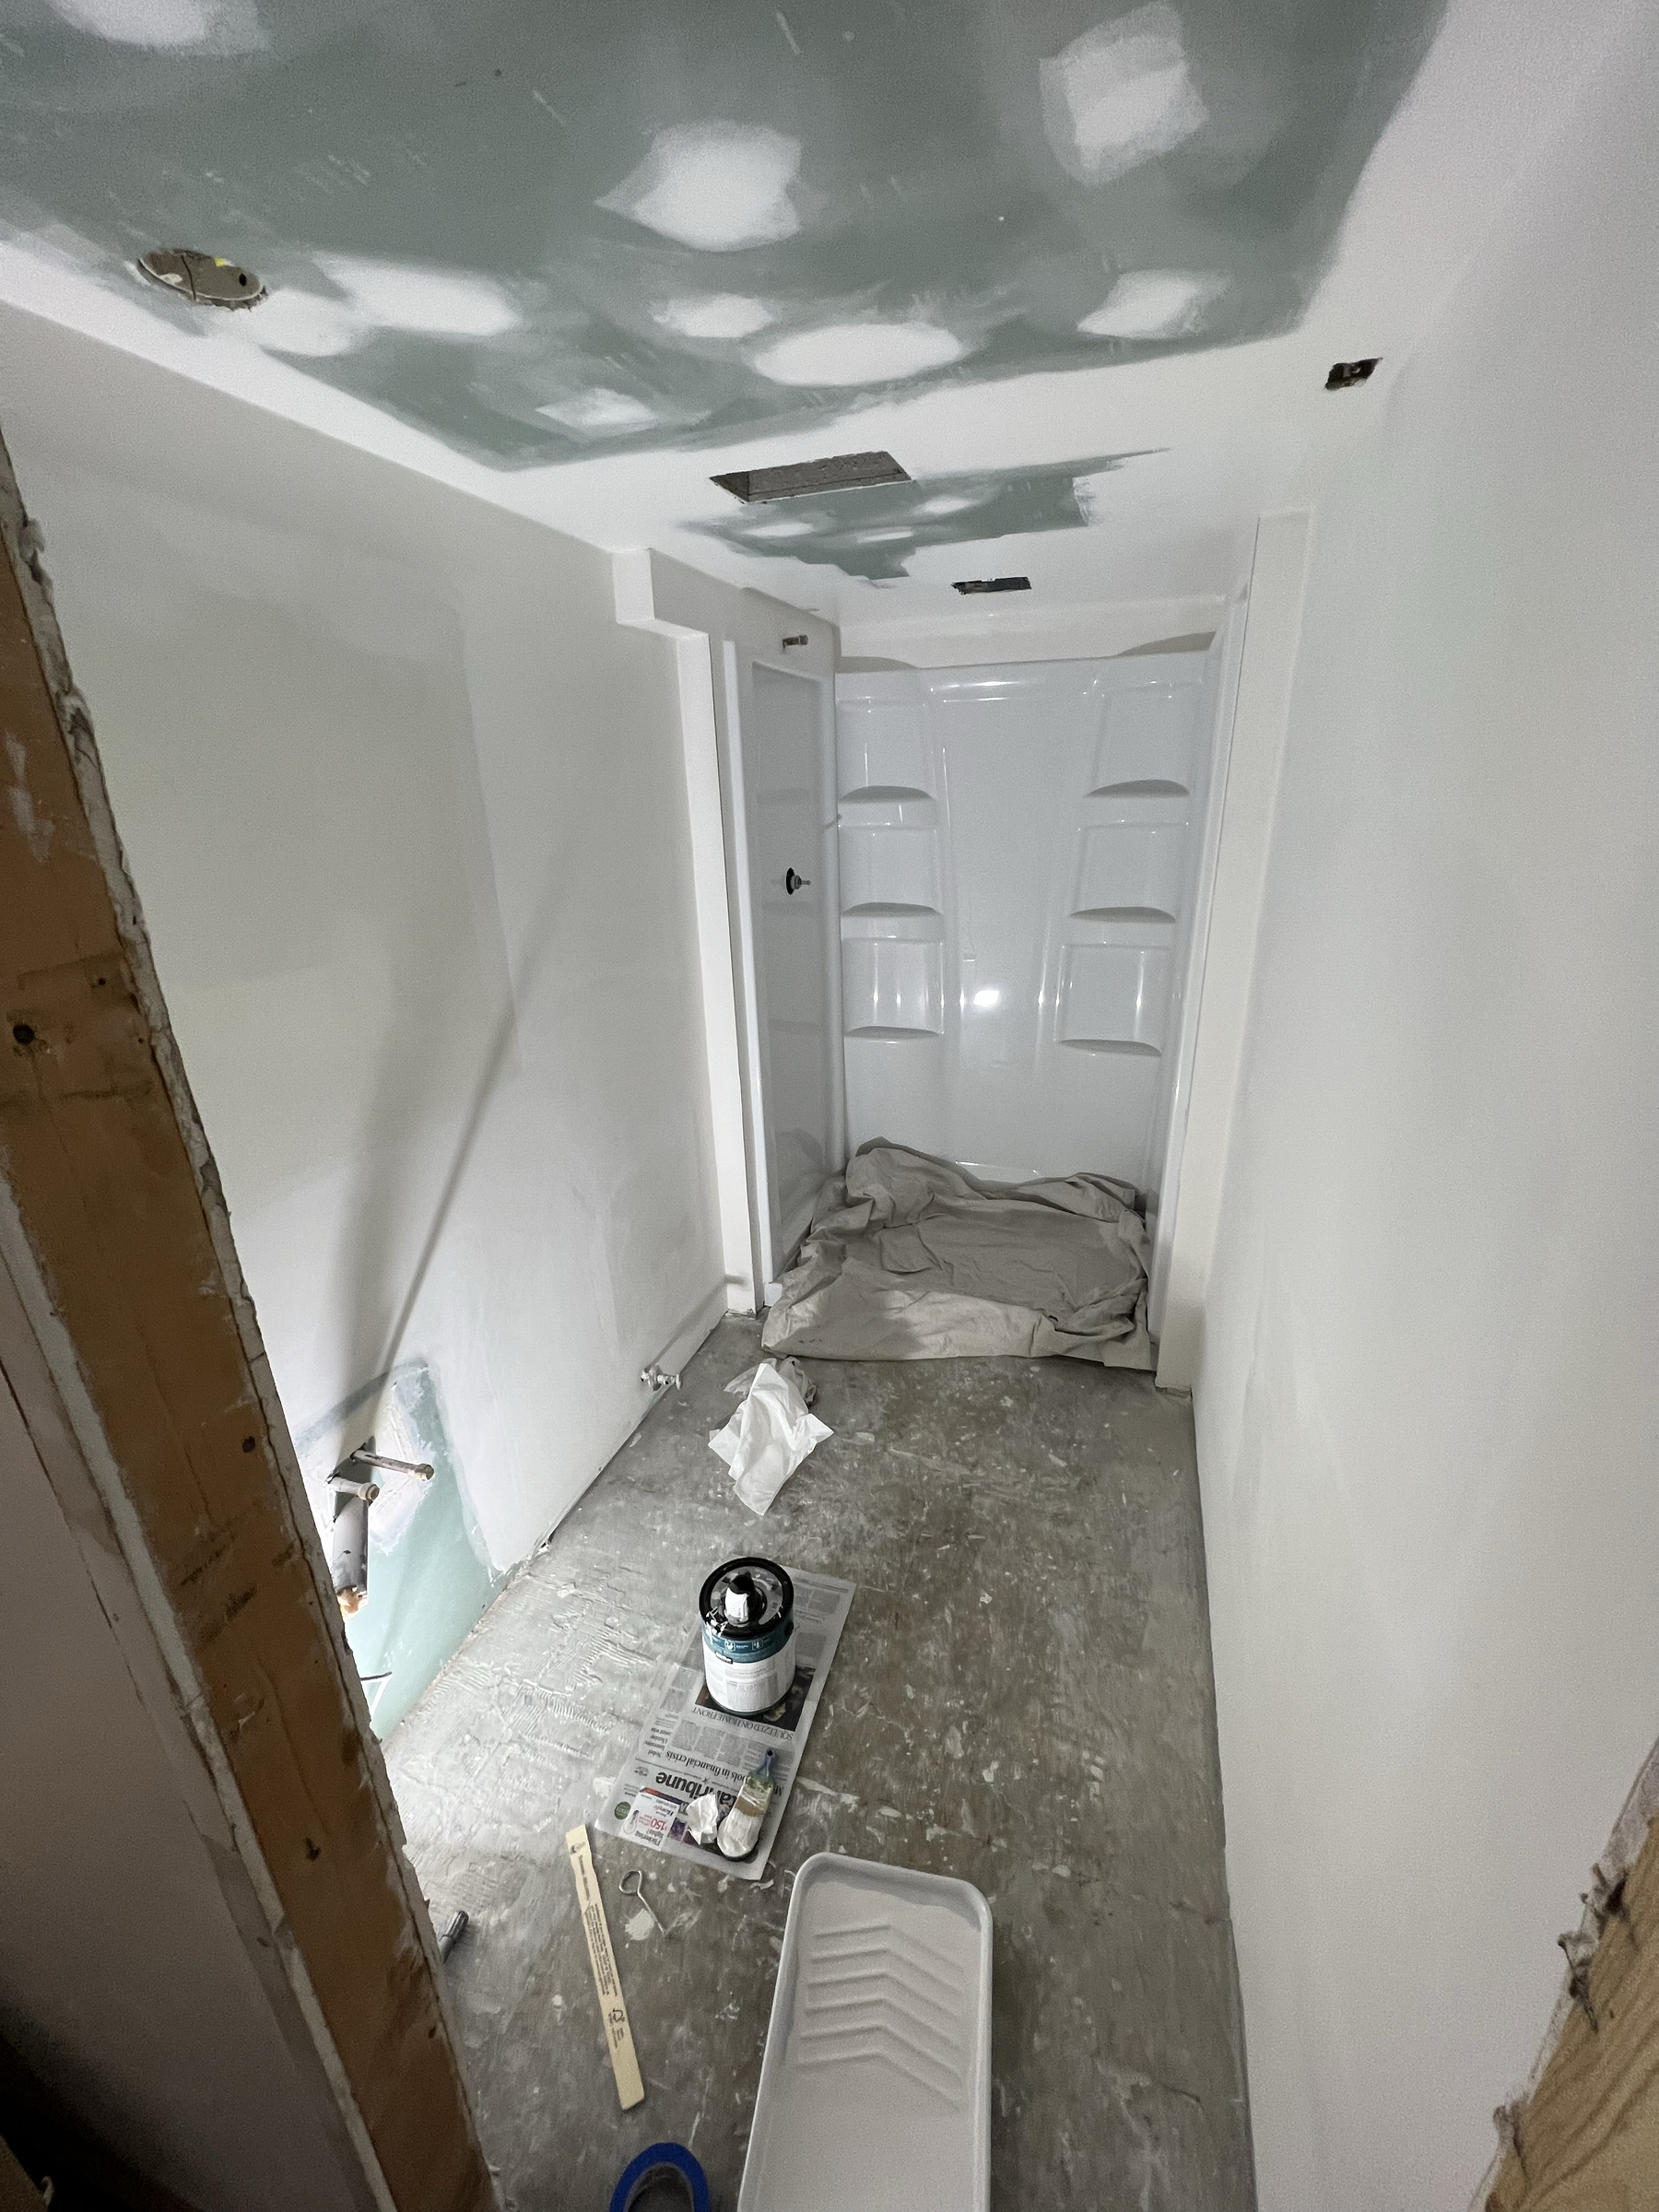
 *Starting to go back together*
This bathroom remodeling project only too me 2 weeks until it was usable where as the first one I did took me just about 3 years (Read more here). Here are my words of advice from my first two bathroom remodels.
Books, Books, and more Books
I have been spending a lot of my spare time lately reading listening to books. So far this year I have completed 24 books (listened to 22, read 2). I won’t list out all of the books as it probably wouldn’t be all that interesting but if you are curious you can check it out here. I have found that listening to books is a good way to pass the time while working on various house projects (e.g., Painting the House).
Also, I stumbled upon the author David Baldacci who has some really good books out there. The topics of his books are around espionage, war zones, traitors and good guys on a mission to contain/eliminate the problems of the people who don’t have the United States interests at heart. If you are interested in those types of Spy/Detective books I would really encourage you to check out the many books he has written (http://davidbaldacci.com/). My favorite series so far is The Camel Club.
So what is next for my book reading? I might take a little break from listening to books and go back to actually reading a couple books that have been in the queue (partially because there isn’t an audiobook for them). What books are you reading or any suggestions you have of good books I should check out? Leave it in the comments section.
Another reason, I might slow my reading/listening to books down is I have been thinking of picking up a couple new projects in the near future. I have a couple of ideas but need to put some more thought on what I hope to accomplish and then reach out for some advice.
Master Bathroom Remodel
I just wanted to start off again by saying this shouldn’t have taken as long as it did but it wasn’t of the highest priority over the past three years. Not that I didn’t want to get it done but when owning a house that needs fixing up, you have to tackle things one at a time, which normally means 10 projects going at the same time.
If you have never done any projects like this before it is defiantly a learning experience and I am not sure if I would have been able to do it without the help of the internet (YouTube specifically). In fact, come to think of it there is so much information/tutorials out on the internet it is surprising what you could probably put together without really starting with much knowledge of a process.
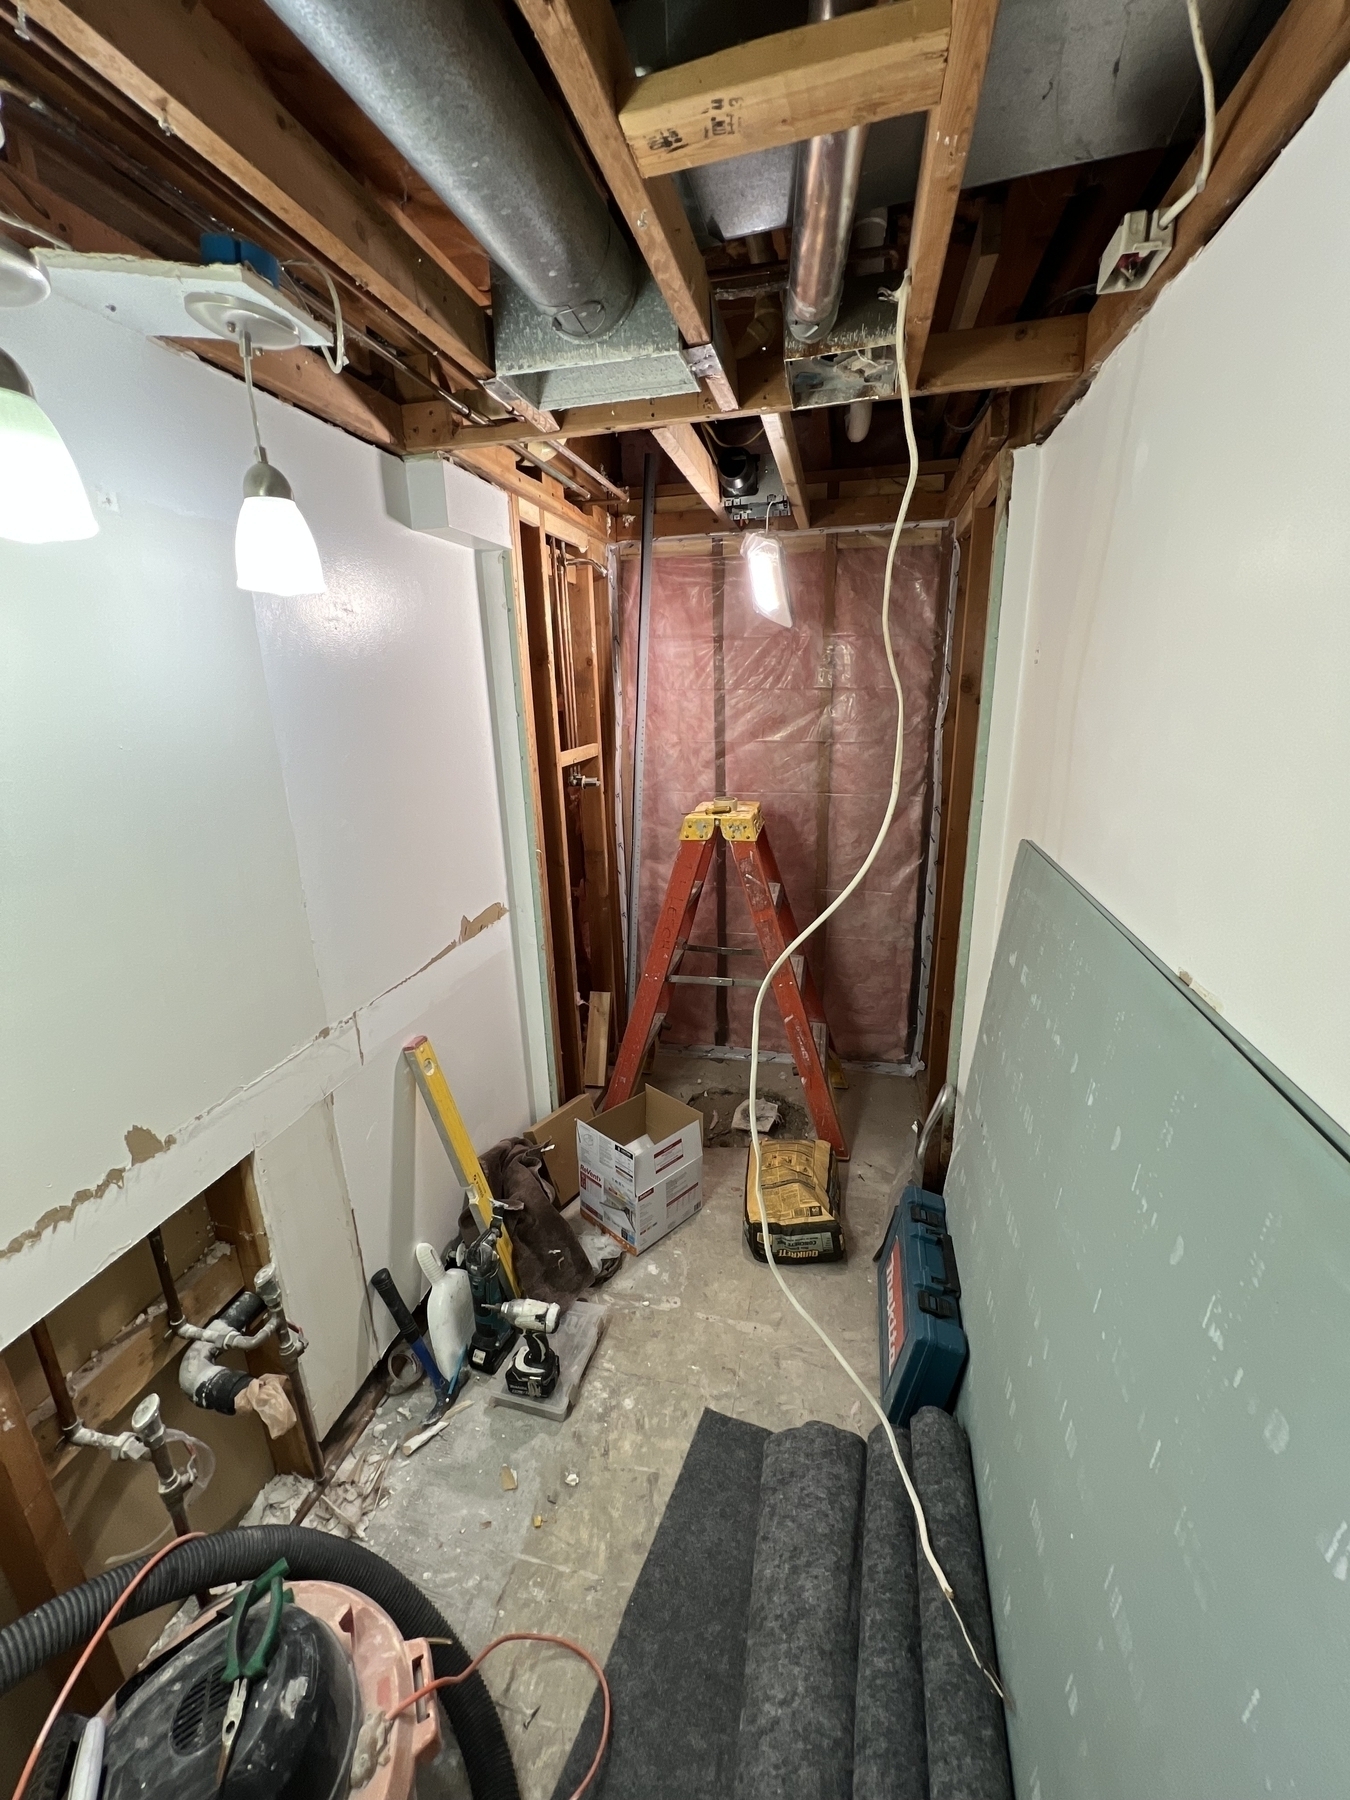
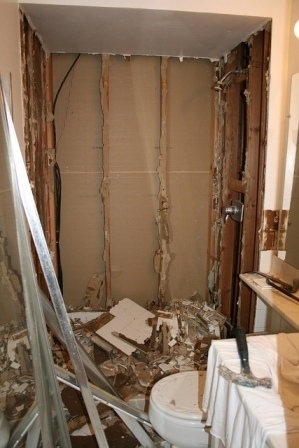
I think the biggest thing I learned through the process is that when you are trying to remake something you always run into 100 more unforeseen problems. One of the biggest scratch-your-head moments was when I was ready to put the Sheetrock back up and on the vanity side, a pipe was sitting farther out than the studs. I have no idea how that was even possible since I didn’t replace or move that pipe or the studs. Needless to say, I had to run to my local Home Depot and get the thinnest boards I could find in order to space the Sheetrock out another 1/8 of an inch. However, there were other issues I ran into as well, which required me to rerun all the electrical in the room causing some delay once I knocked down the ceiling, or replacing a rotten floorboard (wonder if the floor or shower leaked for the previous owners).
Overall, I actually do enjoy working on projects like this and seeing everything come together in the end. Additionally, I am frugal with my money when it comes to things “I could do” or as my wife puts it things “I think I can do.”
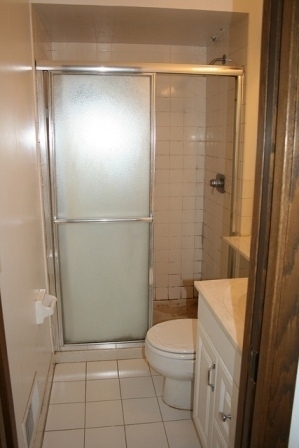
##How it Started
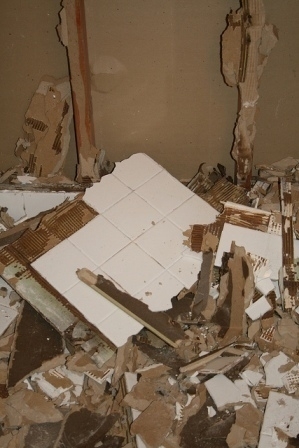
During the Demolition
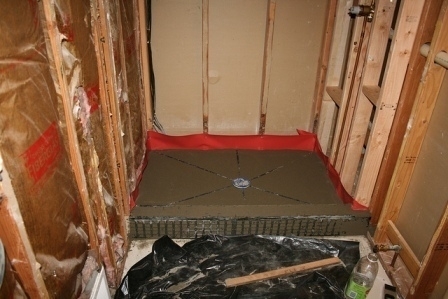
Trying to put it all back together


Final Product